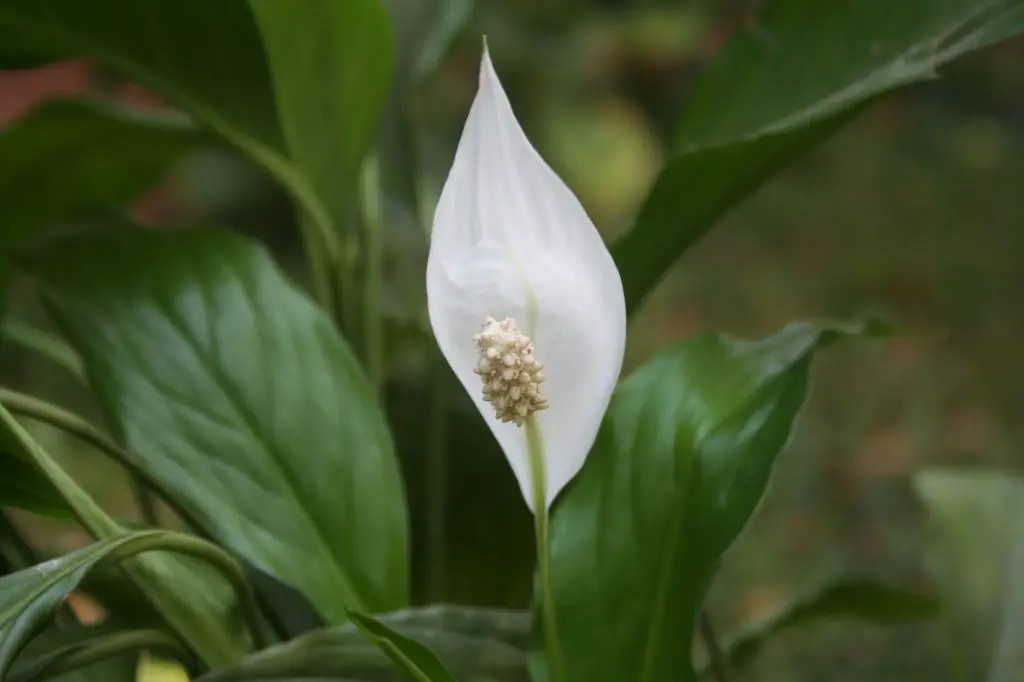
Do you suspect that your peace lily is suffering from root rot? If so, you’ve come to the right article! Keep reading to find out how to spot the symptoms of root rot, what causes it, how to prevent it, AND most importantly, how to treat it!
So keep reading to find out everything you could possibly want to know!
What Causes Root Rot In Peace Lilies?
There are a whole bunch of things that can cause root rot in lilies, so figuring that out first is one of the best things you can do to recover your plant. Here are all the different causes!
Overwatering
If you want to find one of the main causes of root rot in peace lilies, then overwatering may definitely be the most likely. When the water is too moist, your peace lily isn’t going to be able to absorb nutrients and oxygen as easily, and the roots will begin to starve.
On top of this, dark, damp, warm areas are the perfect environment for fungus to grow in. (Such as the fungus that causes root rot.)h
How To Prevent Overwatering
The easiest way to prevent overwatering is to test the soil yourself and see if it’s damp or not. If you poke your finger into the soil and it’s moist about 1 inch deep, then you don’t need to water your peace lily just yet.
And remember, you should adjust the watering schedule based on the environment your peace lily is growing in. (For example, if it’s hotter than usual, they’ll obviously require more water, and if it’s colder than usual, they’ll require less.)
Remember, peace lilies can handle underwatering a lot better than overwatering, so you can err on the side of caution if you’re not sure.
(If you want more information on how to water your peace lily, then check out this article on how to water them.)
Poor Drainage
Poor drainage is going to cause the exact same problem as overwatering, in the sense that the soil is going to be too moist again. Fortunately, poor drainage is just as easy to prevent as overwatering.
How To Prevent Poor Drainage
- To prevent poor drainage, the first thing you should do is make sure that the pot your keeping your peace lilies in pot that has holes in the bottom. This will allow water to pass completely through, instead of staying trapped in the pot.
- You can also elevate your pot off the ground to allow water to drip through effortlessly. If you plan on keeping the pot in a saucer, then make sure you’re emptying the water from the saucer regularly.
- Another thing to consider is the type of potting soil you’re using. If you’re using soil that is too dense or clumpy, water is going to have a hard time passing through and the soil will become too waterlogged. Some great potting mixes to use include perlite, slate and expanded shale, as they drain water a lot better.
Pathogens
You should also be aware of pathogens that can pass from pot to pot and which thrive in wet soil. Pythium, Rhizoctonia, and fusarium are all pathogens. If you think that your peace lily has a pathogenic infection, you should be extremely careful, as they can spread rapidly to other pots.
How To Prevent Pathogens
- Again one of the easiest ways to prevent pathogens is to make sure that the soil doesn’t become too wet. As this creates the perfect environment for them to thrive in.
- You should also make sure you’re always disinfecting any tools you use for your plants. Garden tools spread pathogens from one plant to another so fast, so it’s definitely something you should take care of.
- If you suspect that soil has been contaminated with pathogens, you should also dispose of it right away, and make sure you’re not reusing it. As this can easily spread the pathogens to new plants.
- Lastly, avoid using garden soil for your peace lilies, as this is often a lot more likely to carry pathogens. Instead you should use organic potting soil.
Incorrect Pot Size
You should also make sure that you’re not using a pot that is too big or small. If a pot is too big, then it may end up retaining too much water. And if the pot is too small, then it may end up causing the soil inside to compress, making it harder for water to pass through.
How To Choose The Correct Pot Size
Fortunately, you can choose the right pot size relatively easily. When you think your peace lily has outgrown its current pot, you just need to buy a new pot that is 1-2″ wider in diameter than the current one.
But if you’re still not sure what size pot to get, as a rule of thumb 10″ is normally the perfect size for most peace lilies.
Overusing Fertilizer
You should also make sure that you aren’t overusing fertilizer when growing your peace lily plant. A high-quality potting mix is enough for most peace lilies, so fertilizer use should always be kept to a minimum. If you use too much fertilizer, then your peace lily is going to suffer from nutrient burn.
How To Make Sure You’re Not Using Too Much Fertilzier
The easiest way to make sure you’re not using too much fertilizer is to make sure you’re using the recommended dosage on the bottle. However, it’s also important to remember that peace lilies don’t need a lot of fertilizer. It’s only in spring and summer during maximum growth times that it’s worth using fertilizer. During the winter months, you can avoid fertilizer altogether.
The Container You’re Using
You should also be aware that the container you’re using can also have an effect on the amount of water being retained, thus the increased chance of root rot. Some materials are more porous than others, so you should consider using those instead of less porous ones which keep a lot more moisture in. For example, clay pots are a lot more porous than plastic pots.
Solutions
The solution here is simple; you should consider what pot you’re using when watering your peace lily. If you’re using a more porous pot, then it’s okay to water your peace lily more often. However, if you’re using a pot that holds water in more, then you won’t have to water them as frequently.
Temperature
A peace lily survives best in climates that are between 65-80°F. At this temperature, the moisture in the soil should evaporate to the point you won’t need to water them too often. However, evaporation will take longer in cooler temperatures, and in warmer temperatures, evaporation will happen a lot faster.
You should also remember that if you place your peace lily near windows/AC etc., then evaporation will happen a lot faster.
Solution
Make sure you’re keeping your peace lily in an area where the temperature remains stable. This way, the evaporation rate will be constant, and you can get a better idea of the frequency you should water your peace lily.
Poor Air Flow
While being close to a window or air conditioning unit can cause too much airflow, the other end of the spectrum is also a problem. If you’re placing your peace lily in areas of your home without much airflow, then the soil may not be able to dry up at all.
One big cause of poor airflow is surrounding your pace lily with other tropical plants. When you do this, they can create their own mini climate, which becomes a lot more humid than the rest of the house, making it more difficult for water to evaporate.
This is perfect if your house has a hard time retaining humidity but should be avoided if your house is already quite humid.
Solution
The solution here is simple, make sure you’re placing your peace lily in an area of your house which gets enough airflow but that also isn’t overpowering. Also, if you keep your peace lily around lots of other plants as well, you should consider moving them to make sure they’re not in an environment that becomes too humid for them.
The Roots Are Too Deep
This is most common among beginners, but planting your peace lilies roots too deep can also be a problem. When the roots are planted too deep down, then they aren’t going to have room to grow anymore. This can result in them decaying and rotting.
Solution
When you’re planting your peace lily, you should plant the root ball about half an inch to an inch under the rim of the container. If you’re repotting your plant, then ideally, you want the root ball to sit at the same depth as it was sitting in the previous pot.
Another Infected Plant
If you already have a plant suffering from root rot, then you need to make sure it doesn’t infect your peace lily. The fungus that causes root rot is primarily spread through water. So even water splashing from one plant to another is enough to infect your peace lily.
Solution
If you have an infected plant, do everything you can to keep it away from other plants, especially when you’re watering them. Also, make sure you’re not reusing soil that has been infected with the pathogen that causes root rot. And any gardening tools you use on an infected plant should be disinfected thoroughly before being used again.
What Are The Signs Your Peace Lilies Are Suffering From Root Rot?
Fortunately, root rot is actually quite easy to spot, so if you notice any of the following signs, especially more than one, you can know with certainty that your peace lily is suffering from root rot.
Your Peace Lily Is Beginning To Wilt And Droop
One of the first symptoms of root rot you can expect to see is when your peace lily starts to wilt and get droopy, especially if the soil is moist. You may even notice that your plant is still green at this stage.
However, this is only the case when the soil is still moist. If you notice that your peace lily is drooping whilst the soil is dry, then underwatering is the most likely culprit.
Yellow Leaves That Are Starting To Fall Off
Another noticeable sign of root rot that will be noticeable to you is yellow leaves that are beginning to fall off. While this is most likely due to overexposure to direct sunlight, there are times it could also be root rot. So if you do notice yellow leaves, don’t dismiss them as sunlight straight away. You should also keep an eye out for other symptoms too.
Wondering why your Peace Lilies started having brown spots? Click here to find out and what to do about it!
The Leaves Are Browning
Another symptom is that the leaves are starting to brown. When leaves are browning, it’s most often the direct result of overwatering, which, as you know, increases the chance of root rot.
At this point, if you think your plant has been overwatered too much, then you should consider repotting them in fresh dry soil.
The Roots Have Become Mushy
If you’ve noticed some of the symptoms above, then it’s time to check your peace lilies roots. Roots that have become mushy and poorly developed are a clear sign that your peace lily is suffering from root rot.
However, to check the roots, you will need to remove your flower from the potting mix to check the roots. As well as looking to see if the roots are mushy, you should also check to see if they’ve changed color.
If your peace lilies roots are healthy, then they should be white in color; however, if they’ve started to go brown, this is a clear indication that they’re damaged.
Stunted Growth
Lastly, as your peace lily will be unable to absorb enough nutrients, you’ll notice that the plant’s growth overall is stunted. By this point, your peace lily will only have a few healthy roots left, and you should consider repotting them immediately.
How To Treat A Peace Lily Suffering From Root Rot
If your peace lily is suffering from root rot, there are two different ways you can save them. The first method is to repot them, and the second method is hydrogen peroxide treatment.
Method 1: Repotting Your Peace Lily
Here’s a step-by-step guide on how to repot your peace lily.
- First of all, you should gently remove your peace lily from the pot. Remember to do this slowly, and don’t tug too hard as you may damage some healthy roots
- Once your peace lily has been removed, carefully clean the roots by washing them under running. Oce again, remember to be careful when you do this. A slow stream is best, as water that’s too powerful could damage the leaves.
- Once you’ve removed most of the soil, use a pair of gardening scissors to chop off all the roots that are showing signs of rot (brown in color). Remember it’s vital you get every infected root. If even one root is left with root rot, then it will spread in the soil, and you’ll be back to square one.
- If you notice some roots aren’t entirely infected, then cut the root where the rot hasnt’ taken hold yet.
- In cases where a lot of roots needed to be removed, it may be neccessary to prune some leaves off as well. Doing this will help the roots better nourish a few leaves, instead of trying to spread the nutrients across a whole bunch of them. (And if you are going to cut the leaves, make sure you’re disinfecting your equipment thoroughly first.)
- And as a final step to remove any fungi, place the roots of your plant into an anti-fungal solution such as Bonide Copper Fungicide
- When returning your peace lily, it’s better to use a new pot, but if you’re going to use the same pot, then make sure you’ve disinfected it thoroughly with bleach beforehand.
- Then all you have to do is, add potting mix to the new pot, place your peace lilies root ball back at the same level you found it and give the soil a little bit of water.
Method 2: Hydrogen Peroxide Treatment
The other method you can try is adding hydrogen peroxide to the potting mix. Hydrogen peroxide has two benefits. The first is that it’s going to kill the fungus in the soil, and the second is that the extra oxygen molecules in hydrogen peroxide are going to help your plant’s root growth.
If you’re going to treat your peace lily with hydrogen peroxide, then you should do the following.
- First of all, give the soil time to dry. This way the hydrogen peroxide is going to become diluted, with water that’s already in the soil.
- You should then prepare your hydrogen peroxide solution. When using hydrogen peroxide go for a 3% solution and mix 1 teaspoon with 1 cup of water.
- Once you’ve done this, beginning watering the soil around your peace lily, making sure to get none of the solution on the peace lily itself.
- You should water your peace lily with hydrogen peroxide solution as often as you’d water them normally until the root rot has cleared up
If you see your Peace Lily leaves turning black, however, click here to find out why!.
How Can You Prevent Root Rot?
Treating root rot is one thing, but preventing it from happening in the first place is always the best solution. Here are a few things you can do to prevent root rot from happening again in the future!
Make Sure The Soil Is Loose
First of all, you should make sure that the soil is loose to ensure that water can drain through it adequately. To do this, all you’ll need to do is get a butter knife or chopsticks and begin poking loads of holes into the soil.
Just make sure you’re disinfecting whatever you use beforehand to reduce the chance of infecting the soil with a new pathogen.
Avoid Overwatering
This is the easiest step to take. Make sure you’re never overwatering your peace lily. To ensure that there’s not too much moisture in your peace lilies pot, do the following. Poke your index finger into the soil down. If you notice the soil is damp at your first or second knuckle, then you won’t need to water your peace lily just yet.
Raise Your Pot Off The Ground
Another way to ensure that your peace lily is draining properly is to raise the pot off the floor. Doing this will allow the water to pass through completely instead of getting stuck in a saucer underneath the pot. And if you do need to keep your pot in a saucer, make sure you’re emptying the water out of it regularly.
Consider The Watering Schedule
A lot of people recommend sticking to a watering schedule when it comes to your peace lily. However, this may not be the best option. If you’re using a watering schedule, then you may end up overwatering or underwatering your peace lily when the environment changes.
Instead, try using the method above to water your peace lilies only when the soil isn’t moist anymore. This is going to give you a watering schedule that is a lot more tailored to your plant.
FAQ
Here are some common questions people ask about peace lily root rot.
Can Your Peace Lily Recover From Root Rot?
YES! It’s absolutely possible for your peace lily to recover from root rot if you give them adequate care and attention. And the earlier you catch the root rot, the more likely it is your peace lily will recover.
If you do catch root rot early, don’t be discouraged if you don’t see signs of recovery straight away. It can take days or weeks before your peace lily goes back to how it was before.
Should You Water A Peace Lily With Root Rot After It’s Been Repotted?
It’s best to wait a little while after repotting your peace lily, as the roots may not be functioning as well as they normally would. In fact, if you water your peace lily too quickly, you could increase the chance of root rot happening again.
Can You Reuse Soil With Root Rot?
It is possible to reuse soil with root rot; however, you would need to sterilize it first. You can sterilize it by mixing it with water and then heating the mix up to a boiling point. However, it’s a lot easier to just use fresh soil.
Recap
As you can see, root rot is entirely treatable, and with the right care, you can get your peace lily back to its healthy self in no time
Curious whether Peace Lilies come back every year? Click here to find out!. And remember, while treating your peace lily for root rot is great, in the future, you should definitely do whatever you can to prevent it from happening again!
And if you like this article, make sure you check out the rest of the website! Otherwise, have a great day!

")
")
")
")
")
