Microgreens are a rather new addition to the culinary world, but these flavorful leaves are more than welcome in our dishes. Not only do they add an aromatic flavor to our meals, but they also have a concentrated nutrient level. Adding a handful of microgreens to any meal can instantly boost the nutrient value.
While microgreens are an amazing addition to the kitchen, they are also very expensive. If you enjoy them then you should consider growing your own, it’s a great way to save money and have microgreens available at all times. Follow this guide to learn how to build a DIY microgreen rack setup.
What Do You Need? (And How Much Does It Cost?)
Before you begin your DIY microgreen rack setup, you’ll need to get your supplies ready. This project will go a lot smoother if you have everything prepared ahead of time. Here is a list of everything you will need to make the rack setup:
- Rack or shelf
- Circulation fan
- 20 Watt grow lights (approximately 18)
- Extension Cord
- Shelf protectors
- Zip ties
- Timer
Rack or Shelf Setup
When choosing a rack or shelving display for your microgreens, you will need to keep spacing in mind. How many microgreen plants do you intend to grow? Each microgreen tray will need an adequate amount of space, 1 foot of width and 2 feet of depth.
There are many suitable options of material to build the microgreen rack from. Most people prefer to use metal/ steel or wood for their DIY microgreen rack setup. Depending on the materials you choose to use and the size of your rack, the supplies to build our rack could cost approximately $25 or higher.
Circulation Fan
It is necessary to set a fan up by your microgreen rack. This is important because microgreens need good quality air circulation. A fan can help minimize the risks that come with poor quality air, like mold. You may find that a dehumidifier will also help keep the moisture in the air to a minimum to keep the microgreens growing healthy. Ideally, the humidity should stay below 70 percent.
You don’t need to purchase a special type of fan to ensure the microgreens have adequate circulation. Fans will vary in prices depending on which features you would like. A basic fan starts around $15 and the price raises depending on the strength and features.
However, if you do want a professional-level microgreen rack then it is a good idea to invest in mini fans that can be secured to the shelf.
Grow Lights
When making a DIY microgreen rack setup, your grow lights are one of the most important parts. Without them, the plants will be weak and pale. It is recommended that you use 20-watt bulbs, and most rack setups will need at least 18 lights to keep the plant healthy. Microgreens require 6 to 8 hours of light each day.
If you can, try to place your microgreen rack near a window to get some extra sunlight. The cost of lights will vary, depending on where you get them from. Most homeowners notice an average increase of $8 to $8.50 to their monthly power bill.
Extension Cord
Extension cords are important! Make sure you have a sufficient power supply running to your microgreen rack to keep the fan and lights operating.
Shelf Protectors
It’s a good idea to line the shelves with shelf protectors because it will help protect the microgreen plants on the lower shelves. It will also keep the shelves clean from soil and plant debris.
Zip Ties
Zip ties are an inexpensive item that you may be able to find at a local dollar store. These will come in handy for attaching the lights and timer to your shelves.
Timer
We recommend using a timer for your lights so you don’t have to worry about their schedule. Timers will vary in price depending on where you purchase them from and which features you want.
Related Articles:
- Why Are Microgreens So Expensive (And How Much Do They Cost?)
- Microgreens Humidity And Temperature (Complete Guide)
- Yellow Microgreens (Why It Happens & What To Do)
How To Build Your Microgreen Rack Setup From Scratch
It’s time to stop paying those extra high prices for microgreens at the grocery store, and time to start growing them yourself. Now that you know exactly what you need to build your own DIY microgreen rack setup from scratch, follow these steps to start growing your own microgreens today:
Step 1:
The first thing you will need to do is determine where you would like to set up the microgreen rack and clean up the area for setup. You may want to put a protective mat where you plan to set up the rack to protect your flooring.
Step 2:
When it comes to your setup, you will want to start with the rack/ shelving unit. If you have purchased a prepackaged rack, you can set it up according to the instruction manual. However, if you are building the rack out of your own material it’s a good idea to get the legs assembled first.
Once the legs are assembled in place, you should be able to attach the shelves in place one by one. When you’re assembling the shelves, make sure there is at least 10 to 12 inches of space between each shelf. Before moving on to the next step, make sure all shelves are balanced and secure.
Step 3:
If you have decided to get the fans that can be secured to the shelf, this is the next step to take. If you are using a stand-up fan you can jump ahead to step 4. Using zip ties, you can secure the mini fans to the shelves.
It is recommended to place them on the sides of the rack, towards the center of each shelf to ensure adequate air circulation for all of the microgreens. The easiest way to secure these fans in place is to slide a zip tie through the holes in the fan and secure it to the edges of the shelves.
Make sure to secure the top two holes of the fan to make sure it stays in place. Here’s the tricky part though, you will need to connect all the fan’s power source wires together while making sure the fan’s controller is still accessible. We recommend using the zip ties to prevent the wires from moving around after you have connected them.
Step 4:
Using the zip ties, secure the extension cord in place. We recommend placing the extension cord on one of the rack’s legs. You can use several zip ties to make sure it stays in place.
Please note: Many of the mini fans from step 3 are powered by USB cables. It’s a good idea to invest in an extension cord that has USB ports for these fans.
Step 5:
Next, you will need to attach the lights to your rack. If you are using a metal or wire rack then you won’t always need to use zip ties to secure them in place. However, if you have built a wooden microgreen rack you may need small chains to secure the lights in place. This is because the wooden beams are wider than the rack wires.
For anyone who is setting up a wire rack, the best way to secure your lights is by sliding one of the triangle connectors for the power supply through one of the triangle openings on the frame of the rack.
If this is done on both ends then the light will stay securely in place. Make sure a light is added at both ends of a shelf and the middle to ensure your microgreens get enough light. You may not be able to use the triangle connectors to secure all of the lights, so use zip ties to attach the remaining lights.
Step 6:
The next thing you will need to take care of is setting up the timer. We recommend placing it at the bottom of your extension cord so it’s not in the way. The best lighting schedule to get your microgreens on is 17 hours of lights on and 7 hours of them off.
Step 7:
So your rack is now set up, but it may not look complete. This is because you still need to take care of the mess of wires. Zip ties have been a huge helping hand through this entire process, and they are about to help with the aesthetics as well. You don’t have to tie those wires back, but it will make the rack look a lot more organized.
The best way to do this is to neatly wrap your loose wires up into loops and attach them in place with zip ties. Start at the top of your rack and work your way down to keep everything organized. The more snug the wires are, the better.
Step 8:
Before starting your microgreen plants, it’s a good idea to line the shelves with protective shelf liners. This isn’t necessary but will keep things tidier and help protect plants on the lower shelves. Once your liners are in place, your DIY microgreen rack setup is ready to go.
Related Articles:
- Why Are Your Microgreens Falling Over (And How To Fix It)
- Fenugreek Microgreens (FAQ, How To Grow, Pests & Benefits)
- Microgreens Lighting Guide (All FAQ’s Answered In-Depth!)
Things To Remember About Your DIY Microgreen Rack Setup
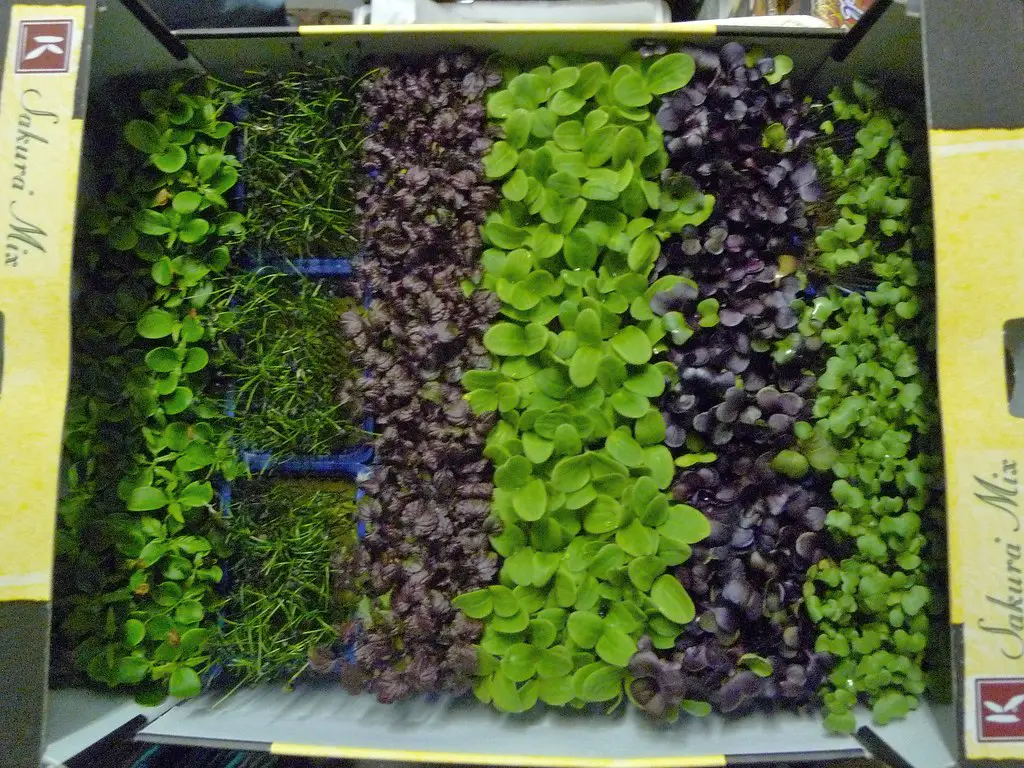
Once your microgreen rack is ready, you will probably be looking into microgreen trays. Many people believe that they need to find trays with drainage holes, but this is just a myth. You see, the microgreens’ root systems are so shallow and they grow too fast to be affected by too much water.
Even though drainage holes aren’t necessary, often more experienced microgreen growers prefer them because of this one neat trick they discovered. When the containers have drainage holes, the excess water given to the top plants can be used to water the plants on the shelf below them. This only works if they don’t have shelf liners in place.
Microgreens are incredibly versatile, so they can be grown in just about anything. Ideally, they should be grown in flat and shallow containers. Most people prefer to stick to the plain black starter containers that most nurseries and retailers sell because they’re affordable and very durable.
What else do you need to know about building your own DIY microgreen rack setup? These are some of the most frequently asked questions:
How Can I Keep My Microgreen Rack Clean?
Even though protective shelf liners aren’t necessary, they can be very useful for keeping your microgreen rack clean. Once you have harvested the microgreens, you can remove the trays and wipe down the liners with a damp cloth.
However, many people prefer not to use the shelf liners because they like to allow the top plants to water the lower ones. In this case, you will need to clean all the microgreen trays at one time and wash the microgreen rack while they are off. When you do this, make sure you brush off any excess dirt before wiping the rack down with a damp cloth.
Cleaning your microgreen trays is very easy too, and a great way to keep your rack clean for longer. Simply wash them in your sink with soap and warm water, no differently than washing the dishes.
How To Pet-Proof A Microgreen Rack Setup?
Growing your own microgreens is all fun and games until your cat discovers your new setup. No matter how hard you try, it can be difficult to keep a curious cat away from a rack of plants. Since cats are such good jumpers, they can even get at the microgreens on your top shelf.
If you have cats, your best option is to designate a room in your home to be a cat-free zone and grow the microgreens in there. However, we realize this isn’t an option for everyone and there is another option to keep your microgreens safe from your cats. You may have to find a light breathable fabric to cover your rack. We recommend using a mesh canopy.
Microgreens are safe for cats (and dogs too) so if your pet does get on your rack the only thing you will need to worry about is replacing your plants and finding a better way to keep your cat out.
Why Are Microgreens So Expensive?
Microgreens cost a lot more than other vegetables, but why is that? They are grown from regular seeds, what makes them so special? Microgreens are studied to have twice as many nutrients as other sources of vegetables. This is because early leaves hold more nutrients.
In order to grow microgreens, more attention is needed because they have such a rapid growing time. Most microgreens are ready to harvest in an average of two weeks. Because of this quick-growing process, microgreens require more seeds, light, and attention. They could cost a gardener more time and money to grow when compared to other herbs and vegetables.
If you were to sell your microgreens for the same price as you would charge for lettuce or basil, then you would end up losing money. Microgreens cost more money because they are more expensive to grow. This is part of the reason why they need their own type of rack for growing.
How Often Should I Water The Microgreens?
Now that your microgreen rack is set up, you will need to make sure the plants are well taken care of to grow successfully. Since microgreens grow so quickly, they may need water every day to stay healthy. However, that will depend on the size of the container they are in. The best way to water them is to give them water from the bottom.
Try to put the water at the bottom of the container so the soil can soak up the necessary amount without getting the leaves wet. One thing to note is that different sized containers will need different amounts of water. You will need to be the judge of how frequently you water the microgreens. Ideally, you should wait until the soil feels dry.
While shallow containers will likely need water every day, a deeper container may have enough soil to retain water and will only require water every other day.
Final Thoughts: DIY Microgreen Rack Setup
Now that you know what all is needed to build your own microgreen rack setup at home, you won’t need to pay high prices at the supermarket to eat a healthy diet. Building your own rack isn’t difficult, and a great way to save money on your weekly grocery bill. The great news is, most of the supplies you need to build a microgreen rack are affordable as well.
Most of the supplies you need can be found at a local hardware or department store. There’s a good chance you may already have some of the things needed in your garage. Make sure all your shelves are secure and sturdy before placing your microgreen trays on them. Before you know it, you will have your very own microgreen growing racks at home.
Maintaining a healthy diet has never been easier.
Sources
- https://medium.com/new-farmer/diy-microgreens-rack-first-photos-d0b08dd2a379
- https://www.onthegrow.net/post/professional-microgreens-grow-rack-step-by-step-build-guide
- https://www.bootstrapfarmer.com/pages/ultimate-microgreen-growing-resource?_pos=2&_sid=8dbacccba&_ss=r
- https://www.microgreenscorner.com/do-microgreen-trays-need-holes/
")
")
