
Fenugreek, or Methi, is a fabulous microgreen that’s easy to grow using a hydroponics system. Hydroponics, or water-based gardening, is a great alternative to using soil, especially if space is lacking. We’re going to show you how to grow fenugreek hydroponically (without soil).
What Requirements Does Fenugreek Need?
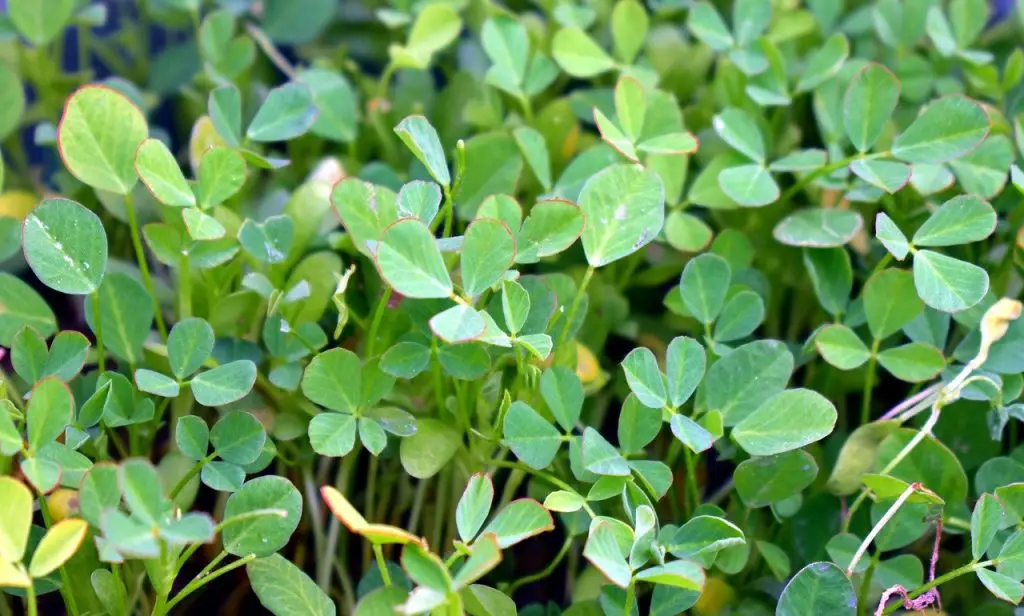
Fenugreek is part of the Bean family, also known as Fabiaceae. This is an annual that can grow as tall as 24 inches. The leaves look like clovers with white or yellow flowers in the shape of curved, thin peas pods. The seed is light brown with a curry taste and harvested from dried pods.
pH Level
Acidity and alkalinity levels are an essential part to growing hydroponic fenugreek. Always maintain a pH balance between 5.5 and 6.5 and only water your fenugreek with this balance. The seeds are very sensitive to pH, so you want to have plenty of test strips handy. Filtered water is good to use because it will be free of chlorine and other harmful toxins.
EC/PPM
Because water is the main factor in hydroponics, nutrients and oxygen are important components to understand. Electrical Conductivity, or EC, is an integral part of the process in delivering dissolved minerals to the plant.
So long as your nutrient has a complete balance, the solution’s concentration will have a major influence on the plant’s growth. This is why you must have a meter to measure the strength of the solution.
TDS versus EC Meters
You can use a traditional TDS meter and measure the water in parts per million (PPM). But there are more modern ways to measure. EC, for instance, is far more accurate because it measures the roots intake. The TDS meter only measures EC of the solution.
High & Low EC Readings
A high EC level will stress the plant, forcing it to lose water and overuse nutrients. This results in wilting. If it isn’t very severe, the plant will adjust, indicated by the presence of hard leaves and stems.
Alternatively, if the EC level is too low, more water absorbs into the root system, resulting in soft growth and a light green color. Low EC will cause fenugreek to lose its curry flavor and lower the quality of growth.
It’s crucial to consistently monitor, measure and adjust EC on a regular basis so fenugreek grows to its best and fullest potential. Exact levels will depend on your seeds and available water. This is why you should have water tested for carbon, hydrogen and oxygen. You can buy an at-home kit or send it to a laboratory.
Spacing
Keep fenugreek seeds close together and do not move them. Whatever surface you use, make sure they will not shift in any way. But they shouldn’t be too close; crowding can cause fungal disease due to lack of airflow.
Temperature
Fenugreek cannot handle cold temperatures or any amount of frost. Ensure it’s in a place where the temperature is at least 60°F or higher. The water should also be warm to protect the roots and safeguard nutrient absorption.
Lighting
Growing hydroponic fenugreek requires at least eight to 10 hours of direct sun per day with partial shade. If natural sunlight is available, great! But you should invest in a grow light for when the plant can’t be outside or during the winter. It should have a powerful LED lamp and optimal ranges designed for hydroponic gardening. Some of these come with timers to make controlling light easier.
Nutrient Requirements
The most important aspect to any hydroponics system is the water’s ability to deliver nutrients.
NPK Ratio
There are three main minerals hydroponic fenugreek must have: Nitrogen (N), Phosphorous (P) and Potassium (K). But they also need oxygen, carbon and hydrogen. The water and air should provide this for the plant.
Gardening centers and specialty growers shops should have formulated hydroponic solutions. Try to make sure the one you select has a balanced ratio of 19-19-19. The numbers indicate the percentage of each micronutrient contained in the formula. If a solution has unequal percentages, you will have to use supplements.
Appropriate Fertilizer
If the fenugreek is fixing nitrogen, then it only needs low to moderate levels of nutrients. To ensure the plant is fixing nitrogen, check the root tips for the presence of small, pink nodules.
Using a phosphate-rich fertilizer will boost the plant’s yield. But take note that because it’s hydroponic fenugreek, traditional fertilizers aren’t advisable. You’re better off ensuring it gets all the nutrients and minerals it needs through a balanced and complete solution.
How to Mix Nutrients
Mixing nutrients ensures a proper distribution in balance and strength of the solution. So, it’s important that you get a solution with a full nutrient profile. If anything goes wrong, you’ll be able to understand what it is right away and take care of the problem fast.
If you don’t have a 19-19-19 fertilizer, you will have to compensate by adding Epsom Salt for magnesium sulfate and Calcium Nitrate. With careful attention to nutrient balance and concentration, you will get the most out of your fenugreek.
Mixing Step-by-Step
- Add two to three teaspoons of NPK fertilizer, and any other supplements, to a gallon of mineral-rich, pH balanced water
- Mix well so everything dissolves
- Add one cup per plant every three weeks
- As the fenugreek matures, increase the frequency and quantity; little-by-little. Start small and only increase the amount based on the plant’s response.
Related Article:
- How To Grow Hydroponic Broccoli (Step By Step Guide)
- How To Grow Hydroponic Habanero Peppers (Complete Guide)
- The Ultimate Hydroponics pH Guide – Why Ph Matters
- How To Convert Your Roots From Soil To Water
- Fenugreek Microgreens (FAQ, How To Grow, Pests & Benefits)

What’s The Best Hydroponic Setup For Fenugreek
There are six main ways you can set up hydroponics. The only downfall with commercially manufactured models is that they’re often expensive.
Aeroponics
The most high tech hydroponics system is Aeoroponics. You can build one and, once you understand the mechanics, it isn’t difficult. The roots suspend to receive nutrients and oxygen via misting every few minutes all day long. You can set up your Aeroponics on a cycle with a fine sprayer to ensure plenty of oxygen gets into the roots.
Benefits vs. Problems
This is a fast way to grow plants and very effective for fenugreek. It does take some experimentation and you do have to get specialized, high-pressure spray nozzles so that there’s proper distribution of nutrients. In the event of nozzle failure, the roots can dry out and cause the plants to die. Plus, obtaining the parts for this system tends to be pricey.
Deep Water Culture (DWC)
Deep Water Culture (DWC) is the easiest method for hydroponic fenugreek. With this system, there’s a basin for oxygen, water and nutrients. Plant roots suspend in the solution via a dish or tray with holes.
Water oxygenation occurs with the help of an air pump through the use of an air stone. This pumps bubbles into the watery nutrient solution of the basin and prevents roots from drowning. You have the option of using some sort of potting media like perlite, coconut husks or vermiculite.
Pros & Cons
This inexpensive, easy setup is great for beginners and at-home use. There’s hardly any maintenance required. Unfortunately, larger and longer-growing plants will not benefit from this method.
Drip Systems
For commercial operations, where high yield is desirable through large-scale growing, Drip systems are the perfect choice. But this is not so ideal for home use, unless you have the space for it. So, if you plan on mass producing fenugreek, it’s great! But for your kitchen or garden, other methods will be better.
The Good & Bad
Drip systems give a high level of control over watering and feeding. They’re less likely to breakdown and they’re fairly inexpensive. But the ones featuring recirculation have unpredictable and fluctuating nutrient and pH levels. Other models will produce high amounts of waste.
Ebb and Flow (Flood and Drain)
Flood and Drain, or Ebb and Flow, systems are less common but quite efficient. Depending on your situation and how much room you have, this can be the best thing for growing fenugreek hydroponically.
Plants grow in a tray filled with a growing medium which is then flooded with a nutrient solution. You fill the tray a few times per day. There are some considerations to take in for this to work:
- Air Temp
- Balanced Nutrients
- Plant Size
- Plant’s Stage of Growth
- Water Requirements
How It Works
Below the tray is a basin with a water pump and a timer for the flooding schedule. Once flooding occurs, the water drains the solution into the basin. Here, an air pump oxygenates the water with an air stone and waits for the next flooding cycle.
Pluses and Minuses
This type of flooding system is very flexible and efficient with endless customization options to fit your needs and available space. You can fill the tray with a potting medium and add net pods to organize and control the roots. But, the roots have the capacity to dehydrate fast if its cycle is off or anything fails. Plus, the plants will need a lot of growing medium.
Nutrient Film Technique (NFT)
Nutrient Film Technique (NFT) is a hydroponic system best used in commercial settings. The plants sit in net pods and potting media, suspending the roots. These then grow in channels with a nutrient solution that runs along the bottom of the channels. Its inherent recirculation pumps the solution back through.
Advantages & Disadvantages
NFT is good for growing fenugreek, if you can afford it. What’s great about this system is that you can harvest plants as they’re ready or as you need them. The recirculation involved means less waste with the least amount of growing medium. But, roots can overgrow and clog the channels. Pump failure is also a common problem, which can ruin your plants.
Wicking Systems
This is the oldest and most basic way to create a hydroponics system. Also called passive hydroponics, this method means you don’t have to have any water or air pumps. The roots take up nutrients and water by use of a wick, which can be anything like a piece of cloth or rope.
It requires some kind of media to transport water and nutrients like perlite, coconut husks or vermiculite.
Pros & Cons
These kinds of systems are excellent for smaller plants, like fenugreek, that don’t need a lot of water and nutrients. This method is super easy if set up right and perfect for newbies. Larger plants will have a difficult time with this kind of setup and need something bigger. Another pitfall is that the plants will die if the wick or material isn’t appropriate.
How To Grow Fenugreek Hydroponically
For a quick at-home hydroponics system, use this in-depth step-by-step guide to learn how to grow fenugreek hydroponically. It’s loosely based on a combination of DWS, Flooding and Wicking:
- Find a basin to hold hot water and also a smaller tray with many holes to fit inside the basin. You also want to make sure seeds keep their individual spots and aren’t easily moved or disturbed. A basket, pasta strainer, colander or similar object will suffice.
- Take about 1/3 cup of fenugreek seeds to wash and rinse. Fill the basin with hot water until the water just touches under the tray.
- Leave them here until they begin to sprout; about two to three days. Be sure to drain and replenish the water every day to prevent mold growth.
- Spray them with a light layer of warm water, pouring off any excess collected underneath.
- Cover the seedlings with a wet towel or cloth and keep away from direct sun.
- For the next several days, twice per day, thoroughly rinse the cloth and cover the seedlings again. Spray the cloth with water and take care to remove excess water every day so they don’t slide from their position.
- When the seedlings sprout even more, you’ll notice raised areas on the cloth. If you are using something like a basket, the roots will be poking out from the bottom. You want cover edges all the way around with additional moistened cloth to ensure nothing dries out. Then top it with the clean, moist towel.
- Once the leaves are full and the plant is four inches tall, harvest, dry (optional) and use.
When Should You Top Off/Change Water?
Topping off and changing water will vary depending on the system you use. For instance, if you’re doing something like Aeroponics, you have to figure out a way to spray the roots with nutrients every few minutes all day long.
If you choose to go with the quick method discussed above, then you’ll want to do it every day until the seeds germinate. Then change the water every few days. Without soil, you have to make sure the water is perfectly balanced and that mold doesn’t begin to grow.
What Are Some Common Pests That Can Affect Fenugreek?
As with all plants, fenugreek does have its issues with pests and diseases that you must observe and look out for. The moment you see a problem appear, you must take care of it.
Aphids
Aphids are an insect that lives on leaf undersides and plant stems. They’re soft and greenish-yellow but can also be pink, brown, red or black depending on the species. Aphids deposit honeydew, a sugary, sticky substance, onto the leaves that encourages sooty mold growth. Tubular structures, called cornicles, will project backwards from the aphid’s body and will not be quick to move when disturbed.
If the infestation is bad, it will cause the leaves to turn yellow or distort their appearance with necrotic spots and/or stunted shoots. On a more mild infestation, meaning it affects only a few shoots or leaves, then you can just prune off the infested areas. Try to use instect-tolerant seeds and silver-colored plastic to act as a mulch deterrent.
More mature fenugreek can tolerate a strong spray of water to knock aphids off. In the event of a serious infestation, you can try an insecticidal soap or neem oil.
Charcoal Rot
If there is discoloration at the soil line with stem cankers that spread upwards, chances are, the fenugreek suffers from a fungal disease called Charcoal Rot. The leaves may wilt and droop with many small black fungal fruiting bodies developing in the tissues. This rot comes from the soil or potting medium.
You will have to inspect the potting medium for any mold or fungal growth. When in doubt, throw out the old medium and get a new one. If you can, salvage anything that appears healthy by either replanting it or harvesting it. Trash the rest of what’s left.
You can try using neem cake or manure to balance the soil and remove the rot, but this isn’t a sure fix-all.
Leaf Spot
When you notice sunken, circular lesions with haloes and discoloration, your fenugreek is suffering from Leaf Spot. This is a fungal disease spread by infected seeds. If there is anything still good and healthy looking, try to save what you can. You will have to throw the rest away and start over, but use fresh seeds.
Powdery Mildew
Yet another possible fungal culprit affecting fenugreek is Powdery Mildew. This appears as powdery white spots on the leaves that grow over time with yellow spots on leaf undersides.
This comes about from shady conditions and poor air circulation. If the mildew is mild, try giving the fenugreek more sun and make sure there’s enough airflow through the roots and stems along with plenty of oxygen in the water. Improper spacing can cause this mildew to grow
How Long Before Hydroponic Fenugreek Is Ready To Harvest?
You should be able to harvest your hydroponic fenugreek anywhere between 12 to 18 weeks, or 30 to 40 days, when it’s around 10 inches tall. Of course, this will largely depend on the system you’re using. Aeroponics, when done right, will produce ready-to-use fenugreek in as few as 10 weeks.
How Do You Harvest Hydroponic Fenugreek?
Follow these step-by-step instructions to harvest fenugreek:
- Ensure the plant has reached at least 10 inches high and that it has a straight, robust shape.
- Make sure the foliage is cool; harvest in the morning or well after the sun has set.
- Hang the fenugreek to allow for seed collection and a bit of drying before use.
- Use a sharp shears to cut about ¼ to ½ inch above the substrate or potting medium. This helps to avoid contamination.
- Replace the roots into the water for one more harvest if the plants are young.
Other Things To Remember When Growing Hydroponic Fenugreek
Oxygen
Fenugreek rhizomes must have plenty of oxygen to grow. This doesn’t just apply to their air intake, but also their water. Both air and water should have high oxygen levels. This will allow for better fertilizer absorption and a reduction in nutrient content.
Soil
Fenugreek loves anything where its roots can drain fast but stay moist. Any loamy or sandy loams will be best suited for fenugreek but do not use fine sand. This will clump and prevent drainage for the same reasons you should avoid using clay.
Transplanting
Although hardy little plants, avoid transplanting fenugreek. Very rarely will it tolerate moving to a new home and it likely won’t survive.
Recap
Growing fenugreek hydroponically without soil isn’t difficult once you understand how it all works. But, you must be tenacious about the water balance, including nutrients and pH, for the plant to thrive and survive.
Be sure to get your water tested to see how balanced it is in hydrogen, carbon and oxygen along with toxins like chlorine and fluoride. Invest in a high-quality nutrient solution with a full, well-balanced profile that contains an equal amount of nitrogen, phosphorous and potassium. Don’t forget adding a bit of calcium nitrate and Epsom salts for additional nutrition.
Make sure it gets about nine hours of light every day and that the foliage receives consistent airflow. Before you know it, you’ll have wonderful, edible fenugreek for food and medicine in about 20 weeks. Have a little patience and don’t be afraid to experiment.
