Microgreens are a quick and easy crop that you can grow yourself year-round. They require little space and make a delicious and healthy addition to your meals.
Which medium to grow your microgreens in is an important choice. Potting soil or other soil-based seed starter medium may seem like the easiest way to go, but that might not be the case for a couple of reasons.
Soil can hold too much water, causing the roots of the seedlings to be unhealthy. Microgreens like to stay moist without being too wet. Also, soil makes for a messy harvest, you’ll end up with a lot of it stuck to your greens, making washing them a chore.
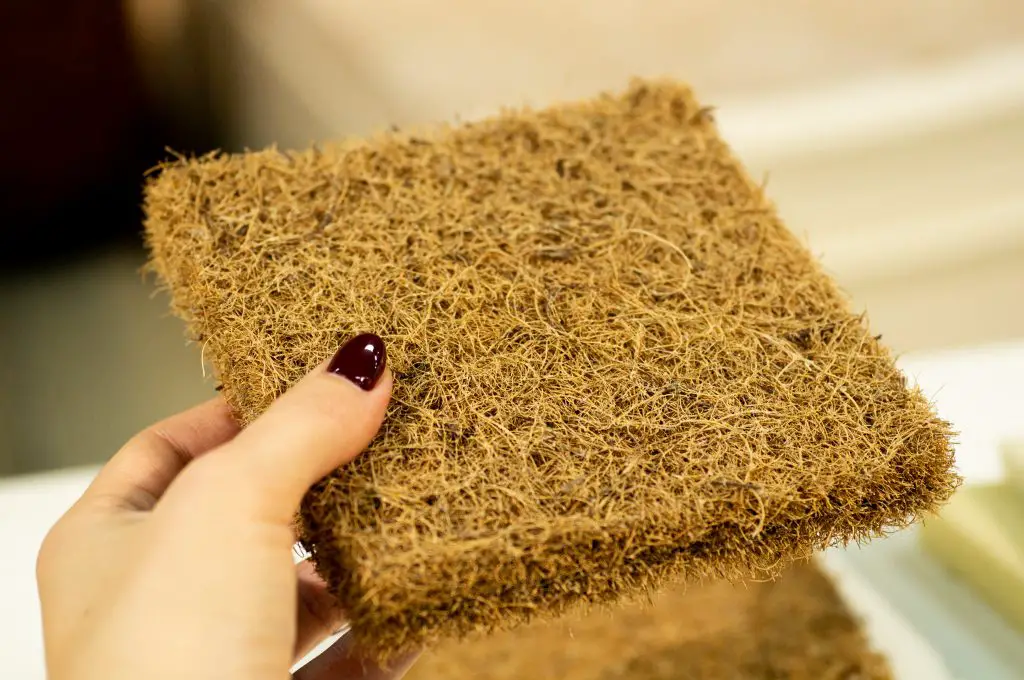
A soilless medium can be a great alternative choice. Coconut coir for microgreens will keep the seeds damp, yet allow for excellent air circulation, preventing rot. It also makes for a cleaner harvest, not clinging to the seedlings in the same way that soil does.
What Is Coconut Coir?
Coconut coir is the fiber from the outer husk of coconuts. These fibers form between the outer cover and the hard, internal shell around the meat of the coconut.
Ancient peoples of South Asia and southern India made rope and other cordage from the coconut fibers and used them in the building of their houses and boats as well as for daily tasks. Coir rope was used extensively for sailing in the 11th century, and in the first half of the 19th century was used in the UK for floor coverings.
Besides its many applications in yarn, string, and other cordage, coconut coir is also used to make floor mats, brushes, mattresses, sacking fabric, and upholstery padding. In spite of this, modern manufacturing sometimes treats the coconut fiber as a waste product.
Types Of Coconut Coir
There are two varieties of coconut coir: Brown, from ripe coconuts, and white, from green coconuts. The fibers differ in texture and durability and have different uses.
The type that is used to grow plants in is the brown coir. Brown coir, harvested from ripe coconuts, contains less cellulose and more lignin than other plant fibers such as cotton and flax, making it less flexible, but stronger. This also is the type used to make brushes and floor mats.
Is Coconut Coir Good For Microgreens?
Coconut coir is a great soilless medium for growing many things, including microgreens. It comes in a finely ground form that is good for starting seeds and doesn’t carry the risk of soil-born disease that potting soil and compost do.
You can also mix it with soil to improve the texture and ph of the soil. It improves aeration and drainage as well.
What Are The Benefits of Coconut Coir?
Moisture Retention and Improved Drainage
Believe it or not, coconut coir can help with two seemingly opposing properties. Coconut fibers absorb and hold water, keeping moisture near the roots of the plants. At the same time, the coir breaks down very slowly and the long fibers create air pockets in the soil, allowing water to drain away from the plant’s roots, helping prevent root rot.
Unlike some mediums, coconut coir does not shrink off of the sides of pots when it is dry, making re-wetting easier.
Doesn’t Compact Easily
Some seed-starting mediums compact too easily, making it difficult for the tiny roots to take hold. Coconut coir is fluffy and soft and doesn’t compact easily. It makes an ideal medium for tiny seedlings to establish healthy root growth in.
Long-Lasting
Because of its high lignin content, coconut fibers are long-lasting and can be reused multiple times. All you need is a little effort to remove old roots and rinse the coir to prevent salt build-up.
Sustainable/ Environmentally Friendly
Coconut coir is an organic material that is a more sustainable option than other soilless mediums such as peat moss, and Rockwool.
Peat moss grows very slowly and is not considered a renewable resource, although some companies grow and harvest it sustainably. It also breaks down much more quickly than coconut coir and cannot be reused so more of it is needed for gardening purposes.
Rockwool is made by heating diabase and limestone to their melting point. The material, while made of natural minerals, is not compostable i.e. it doesn’t break down and ends up in stockpiles or landfills. This is of debatable significance to the environment, but in case it is important to you to use a product that will eventually break down, there is that consideration.
Neutral pH
Coconut coir has a neutral pH. Since microgreens prefer very slightly acidic soil and water, almost neutral, starting with a neutral medium will help keep them at the correct pH levels.
Soil-like And Easy to Work With
Finely ground coconut coir is soft and fluffy and has no bad odors. It is quite soil-like and will seem familiar and be easy to work with.

What Are The Downsides of Coconut Coir?
Contains Few Nutrients
Unlike soil, coconut coir contains very few nutrients. This is true of any soilless medium.
You’ll need to feed your seedlings regularly to enable them to grow. Coconut coir is quite high in potassium which means that calcium and magnesium will be particularly important to add to balance the potassium contained in the coir.
The coir can also attract and hold some nutrients, namely calcium, magnesium, and iron, meaning you may have to add more of these to your fertilizer mix to get the right balance for your plants.
Contains Too Much Salt
Some coconut fibers are soaked in saltwater as part of the processing. The fibers absorb the salt and retain it when they are dried and packaged. When watered the coir will release this salt into the water.
The electrical conductivity of saltwater can deter or prevent plant’s roots from effectively taking up the water. Saltwater conductivity will also make it difficult for the plant to absorb nutrients.
Check out the distributor of the brand of coconut coir you are thinking about purchasing and find out how their coconut fiber is processed. This can save you a lot of headaches later on.
To remove excess salt and make the coir safe to use for your microgreens, rinse the coir in fresh water several times until the water runs clear. Testing the clear water from your last rinse for both electrical conductivity (EC) and pH is helpful to get your greens started on the right foot.
Speaking of pH
While coconut coir is nearly neutral in pH it’s a good idea to check the pH periodically if you are reusing the medium to make sure it is staying in the neutral/very slightly acidic range. Some nutrients can decrease pH, as can watering and humidity.
Growth of Leucocoprinus
Coconut coir is susceptible to infection with Leucocoprinus birnbaumii. This little yellow mushroom grows in moist, tropical conditions, such as greenhouses.
Mushrooms won’t harm your plants, and in fact, the mycelium (or “roots”) of the mushroom add nutrients to the soil or help transfer nutrients to the plants.
If you don’t want the mushrooms in your microgreens trays you can remove them as they pop up. This will also keep them from creating more spores. The mushroom itself is considered inedible and mildly toxic. So, don’t munch on them.
Adding beneficial microbes to coir can prevent the growth of this potentially unwanted fungus.
Other Reasons to Add Beneficial Microbes
Beneficial bacteria also help your plants by increasing the amount of nutrients the plant is able to absorb. One way that beneficial bacteria do this is with specialized proteins known as extracellular enzymes that they release into the soil or soilless medium.
These enzymes act as catalysts that break down the molecules of the nutrients fed to the plants into forms that are easy for the plant to absorb and use. Soil bacteria produce a whole host of groups of enzymes that make these important nutrients available for the plants.
Plant growth can be limited by iron availability because ferric iron has very low solubility. Iron is a micronutrient that is essential for plants and plays a critical role in photosynthesis, respiration, and DNA synthesis.
Beneficial bacteria produce compounds called siderophores, iron-chelating compounds, that take hold of the ferric iron ions and make them easily absorbable by the plant.
How to Use Coconut Coir
Rehydrating Your Coir
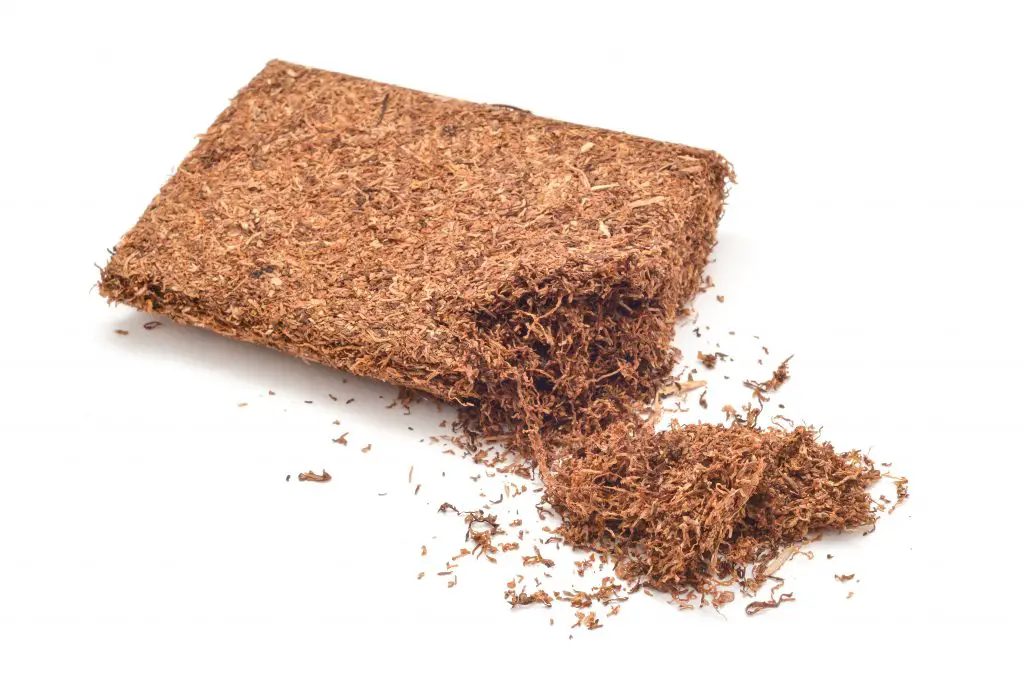
To use your coconut coir, you’ll first need to rehydrate it. Coconut coir usually comes in a compact brick. The coir will greatly increase in size upon absorbing moisture. Place the coir in a bucket or wheelbarrow sufficient to contain its expanded form.
As a general rule, you can expect a half-pound of coconut coir to expand to about a half-gallon, 1.5 lbs will expand to about 2.5 gallons, and 11 lbs will expand to about 16 to 20 gallons in size.
Coir hydrates more quickly than peat moss, but it will still require some patience. It should take an hour or so for the coir to completely absorb the water and expand to its full size.
You don’t want to over-hydrate it. The package will usually indicate how much water you can expect to use. Slowly pour a little warm water over the coir. Use a garden spade or your hands to fluff the coir as it absorbs the water. Make sure you don’t miss any dry spots in the middle of the brick.
If your coir has been soaking for about an hour and it has a soil-like texture, but there’s still water in the bottom of your container, you’ve added a bit too much water for the coir to completely absorb. Place the coir in a container with small holes in the bottom to drain out the excess water.
Using The Hydrated Coir
Once your coir has soaked up all the water it can and has achieved a fluffy, soil-like texture, now it’s ready to use. Fill a seedling tray with about an inch of coconut coir. Pat it down gently and make sure the surface is level.
Sprinkle your microgreen seeds evenly over the surface of the coir, or place them in rows. Very gently press the seeds down with a piece of cardboard, or use your hand.
Note: if you are growing microgreens from larger seeds, such as sunflowers, peas, or wheat, soaking them overnight in warm water will assist with germination. Smaller seeds do not need to be soaked.
Evenly cover the seeds with a very thin layer of coir. Your seed packet or instructions that came with your seeds will usually indicate how much cover leads to the best germination rates for each variety of seeds.
Mist the whole tray lightly with water. (Don’t pour water on the trays as this will dislodge your seeds)
Check the moisture of your seed trays every day and mist them at least once a day. Mist more often if needed to keep the trays evenly moist.
In about three to seven days you’ll see your seeds begin to sprout. Continue to mist the seedlings twice a day to keep them happily growing.
Remember, you’ll need to feed your plants to keep them healthy and growing because the coconut coir does not contain the same nutrients as soil. You’ll be feeding your plants by mixing fertilizer into the water you are misting them with.

What Is The Best Coconut Coir to Use?
There are many good brands of coconut coir to choose from. Coco Bliss by Platonix has many great reviews on Amazon. According to reviewers the product is low in salt (so you don’t have to rinse it yourself) and has a neutral pH. Perfect for growing your own microgreens.
There is only one ingredient listed for this product: Coconut Coir Pith. It is OMRI listed for organic use.
FAQ
What Do You Do With Coconut Coir After Harvesting Microgreens?
Reuse and recycle! This material can be washed, mixed with some fresh coir, and used again as a growing medium for as long as it continues to absorb water and retain its structure.
You can also reuse the coir as mulch, or to amend difficult soils such as clay or other hard soils.
How to Reuse Your Coconut Coir
Note: steps one through three may only be necessary if there are a lot of roots to remove from your coir. This will probably not be the case with microgreens and you may be able to skip it.
- Allow the coco coir to dry out as much as possible. Set your seed trays aside in a dry place and wait a few weeks. Or dump the coir into a bucket or other container if you are using your seed trays again immediately.
- Remove as many roots as you can. It’s only important to remove the biggest roots or big clumps of roots. If your coir is dry these are easily pulled out. If you live in a very humid area and the coir remains damp removing the roots will take a bit more time.
- Rehydrate your coir. The process will be similar to hydrating the coir in the first place, except it won’t be in a brick.
- Rinse the coconut coir to remove excess dust (coco peat). The dust will absorb too much water to be as useful for microgreens because it doesn’t have the aeration ability of the longer strands. Use a strainer with a very fine mesh to retain the longer strands of coir.
(You can rinse and strain the coir in your yard or garden to take advantage of the soil-amending benefits of the coconut peat you are rinsing away.)
5. Soak your coconut coir in a solution containing the nutrients the coir naturally attracts and retains that we mentioned earlier(calcium and magnesium). The coir will retain these nutrients and not need to take them from your fertilizer while you’re growing your next batch of seedlings.
(Make a solution following the instructions on your cal/mag fertilizer container (some suggest a 150% solution) and soak the coir for at least 8 hours.)
In Conclusion
Coconut coir is an excellent soilless medium for growing things, including the many varieties of microgreens available.
On the potential “con” side, you must make sure it is free of excess salt before using. Sometimes this requires the time-consuming task of thoroughly rinsing the coco coir several times.
Also, you must make sure to regularly feed your plants nutrients that coir does not contain, but the same is true for any soilless medium.
On the “pro” side, it is virtually pest-free and resistant to many unwanted growths, including various molds. It is usually completely insect-free. Coconut coir soilless medium is fluffy, soft, and soil-like once hydrated and is easy to use.
Moreover, coconut coir is both sustainable, reusable, and recyclable making it a great long-term use product.
So, if you’re looking for the best medium to grow your microgreens in, consider giving coconut coir a try.

