
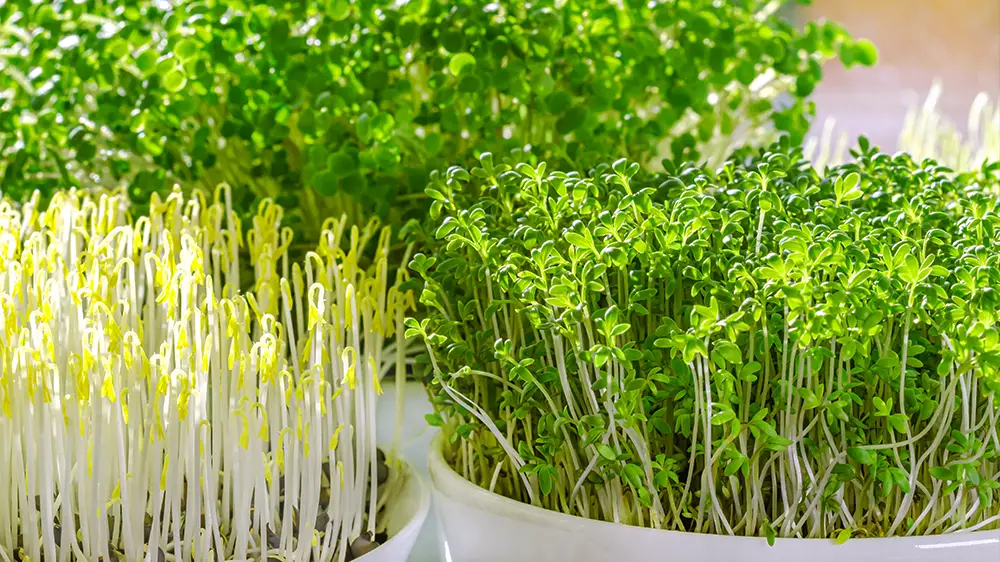
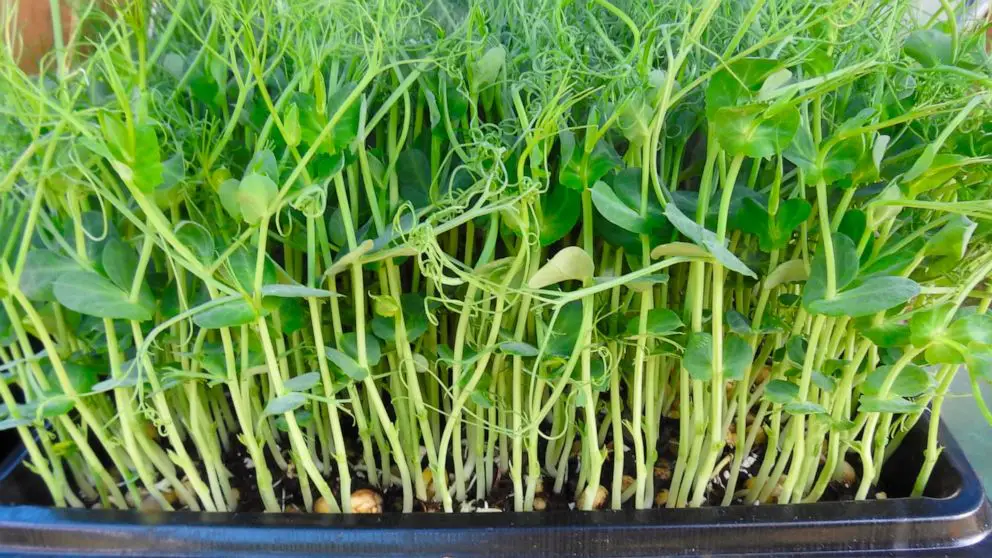
Microgreens (vegetable confetti/micro herbs) are aromatic, young herbs. These are about 2.5-7.5cm tall, packed with a concentration of nutrients. They are a great healthy addition to your diet and pair well in different recipes. If you are looking for a healthy way to spice up your salad, sandwich, soup, or wrap, Sunflower Microgreens is the best choice for you.
Not only are they highly nutritious, but they are also very delicious, combining the nutty flavor of sunflower seeds and the soft yet crunchy spinach-like texture. In just one serving, you get your daily dose of zinc and calcium, not to mention many vitamins, including vitamins A, B, C, D, and E.
The best part is that they are very easy to grow, even at home, and very cost-effective. In this article, we are going to give you a step-by-step guide on how to grow sunflower microgreens, including where you can grow them and everything you will need to do so.
Equipment Needed to Grow Sunflower Microgreens
Firstly, in order to grow the best sunflower microgreens, you will need the appropriate tools or equipment.
So, we have compiled the following list of primary things you will need to get you started:
- Quality sunflower seeds (recommended, organic black oil sunflower seeds)
- Growing container (nursery tray, planting tray, or a shallow container)
- Growing medium (soil, mat, coir peat, etc.)
- Water
- Misting/ spray bottle
- Jar
- Light source (sunlight or secondary light)
- Weights (brick, books, etc.)
How to Grow Sunflower Microgreens in Soil?
Step 1: Picking the Right Soil
Not a lot of soil is needed to grow sunflower microgreens. However, picking the right soil is very important. Most people opt for a seedling mix as opposed to garden soil.
This is because a good quality seedling mix is normally moist but not soggy, as well as light, which is what sunflower microgreens need. Additionally, unlike garden soil, you do not have to worry about soil gnats and other microorganisms found in garden soil that might affect the microgreens’ growth.
Step 2: Soaking the Seeds
Just as it is important to pick the right soil, ensuring the quality of sunflower seeds is also as important. The quality of seeds you use will determine the quality of microgreens you harvest. The most recommended sunflower seeds are the organic black oil sunflower seeds.
Once you have the right seeds, you need to soak them in a jar or container. The water should be warm and four times the amount of seeds you have in the jar. Leave the seeds soaking for about 12 hours.
The reason for soaking is because sunflower seeds have a hard shell. Therefore, soaking softens the shell enough, making sprouting easier.
Step 3: Germinate
After 12 hours of soaking, pour out the water, rinse the seeds using warm water, and soak again for an additional 12 hours, to germinate before draining the water and rinsing the seeds again.
At this point, you should be able to see the sprout tail begin to appear. If, after a total of 24 hours, you still cannot see the sprout tail, you can continue to soak, drain, and rinse the seeds every 8-12 hours until it germinates.
Step 4. Sowing the Seeds
To sow the seeds, first layer your growing container with about an inch of soil. Keep in mind your growing container can be any shallow container suitable for growing plants, not necessarily a plant tray. Some people even use plastic food containers.
Once you have layered the container with soil, sow the germinated seeds, covering the soil in an even layer, such that they are not overlapping one another. There is no need to cover the seeds with more soil; simply press the seeds lightly into the soil. Using a spray bottle or mister, water the seeds and soil until they’re moist, not soaked.
Step 5: Blackout Period
The blackout period for microgreens is a time when the seeds are kept in complete darkness, obscuring any form of light from reaching the seeds. It is important to allow optimal growth and germination.
For the blackout period, cover the growing container with anything suitable, like a towel, lid, or cardboard cutting. The aim is to ensure no light goes through. Once the containers have been covered, place weights, for example, a brick or book.
The pressure from the weights helps the roots of the seedlings become stronger and better anchored to the soil. Additionally, it increases the seeds’ contact with the soil and leads to juicier sunflower microgreens.
The seedlings should be kept like this for 2-3 days. During these days, you must ensure you continuously check the soil’s humidity/moisture level and seedlings as you water them. Ensure the seedlings are not soaked. Otherwise, they may rot.
Step 6: Uncovering the Seedlings
After the blackout period, uncover the containers. You’ll notice the seedlings are a pale yellow, but that is due to the lack of light.
At this point, place the container on the windowsill, or anywhere they can get maximum light. Alternatively, you could use a secondary light source, such as a growing light. However, remember to switch it off at night and turn it back on in the morning.
Remember to keep watering the microgreen daily, preferably in the morning. Always ensure that while watering the soil has the right amount of moisture, it is not too dry or too wet.
Step 7: Harvesting
Between the 7th -11th day from when you planted the seed, the sunflower microgreens should be ready for harvest. To know if they are ready, the seedlings should have grown to about 4inches long, and the second crown has emerged. At this point, their shells should be falling off the leaves.
While harvesting, use a sharp pair of scissors. Do not pull them out with your hands. Ensure you cut the stem just above the soil. You can harvest all of them and refrigerate or harvest only what you need for the day. The soil left can be reused about three more times.
How to Grow Sunflower Microgreens with a Grow mat?
Another beauty about microgreens is that you do not need to use soil to grow them. Grow mats like Terrafibre Growing Mat are made of highly absorbent material, which can retain enough water for the growth of the microgreens.
Wondering why your Sunflower has multiple heads? Click here!
To grow sunflower microgreens using a grow mat, follow the following steps:
Step 1: Soak and Germinate the Seeds
As explained before, soaking the seed softens the shell enough to allow sprouting. Soak the seeds for 12 hours, drain the water, rinse the seeds, and soak them again for 12 hours. This is to allow the seeds to germinate.
If by 24 hours the seeds haven’t begun to germinate, repeat the process of soaking, draining, and rinsing every 8-12 hours until you see the sprout tail begin to appear.
Step 2: Prepare the Grow Mat
As the seeds are germinating, soak the mat in water as well for several hours. It ensures that the mat is well saturated and has retained enough water for the seeds to grow.
Step 3: Sowing the Seeds
Once the seeds are germinated, pour out the excess water in the mat and place it in a nursery tray with the fiber side facing up. Pour the germinated seeds in an even layer over the mat, and ensure no seed is overlapping another.
Keep the mat saturated with water. Make sure it is wet but not covered in water.
Step 4: Blackout Period
If you have multiple containers, you can stack them together and place a weight on top of the cover of the top container. Keep the seedlings in darkness for between 1-4 days, constantly checking the level of moisture.
Step 5: Uncovering the Seedlings
After the blackout period, uncover the seedlings and place them in direct sunlight or under a secondary light source. Do this 8-12 hours a day. Also, ensure you keep the mat saturated by spraying it once or twice daily.
Step 6: Harvesting the Microgreens
Once the shells have completely fallen off the leaves, and the sunflower microgreens are about 4inches tall, you can begin harvesting. Remember to use a sharp pair of scissors to cut out the microgreens.
How to Grow Sunflower Microgreens in Wood Shavings?
Another medium for growing sunflower microgreens is wood shavings. Unlike soil and grow mats, wood shavings are not reusable. However, they are compostable. They also retain more water than soil. Hence, no need to water as much as soil.
To grow sunflower microgreens in wood shavings, follow these steps:
Step 1: Pick the Right Wood Shavings
Much like soil, you need to pick the right type of wood shaving to grow sunflower microgreens. The wood shavings should be a fine size. When purchasing, ensure you purchase wood shavings made specifically for growing microgreens.
Step 2: Soak and Germinate the Seeds
Ensure you soak the seeds for the first 12 hours to soften the shell before draining, rinsing, and soaking them again for an additional 12 hours to germinate.
Step 3: Sow the Seeds
Once the seeds have germinated, pour an inch of wood shavings in the growing container like you would with soil. Then sow the seeds, lightly pressing, so the seeds contact the wood shavings and completely cover the shavings but not overlapping. Spray the seeds and shavings with water until moist.
Step 4: Blackout Period
Cover the container with a weight over it and place it in darkness for 1-4 days. Always check the moisture level of the seeds and wood shavings as you water them.
Step 5: Uncovering the Seedlings
After the blackout period, place the seedlings in sunlight or a secondary light source daily, as you water them. Ensure, however, that you do not soak the seeds. Remember, wood shavings have higher water retention compared to soil.
Step 6: Harvesting Sunflower Microgreens
Once the sunflower microgreen has grown about 4 inches tall and sheds its shells, you can harvest them using a sharp pair of scissors. Cut the stem from the point just above the wood shavings.
Related Article:
How to Grow Sunflower Microgreens on Growing Paper?
Growing paper is yet another exciting way to grow microgreens. It can be flat like normal paper or rigged to hold the seeds in place. Unlike normal paper, however, they are specially designed to hold water and allow the seeds to germinate.
You can grow sunflower microgreens on growing paper using the following steps:
Step 1: Soak and Germinate the Seeds
As always, ensure the seeds are soaked for about 12 hours before germinating them for an additional 12 hours or until the sprout tail begins to show.
Step 2: Prepare the Growing Paper
Like with grow mats, place the growing paper in a nursery tray. Soak the growing paper in water for several hours as the seeds soak. Once the seeds are ready, drain the water from the paper.
Step 3: Sowing the Seeds
Pour the germinated seeds on the soaked paper in an even layer, ensuring no overlap. Keep the paper moist by adding water as much as need.
Step 4: Blackout Period
As the seeds continue to germinate, cover them up, and place them in darkness for 1-4 days. It will allow for optimal growth.
Step 5: Uncovering the Seedlings
After the blackout period, uncover the seedlings and place them on the windowsill for sunlight or under a growing light. Keep watering as much as needed to keep the paper moist enough.
Step 6: Harvesting the Sunflower Microgreens
Once the sunflower microgreens are ready, use a sharp pair of scissors to cut out the sprouts. You can refrigerate them until when you are ready to use them.
How Can You Speed Up Growth?
Naturally, Sunflower microgreens are fast-growing young vegetable greens. In about two weeks or less, you find that you are already harvesting. But the growth speed can always be increased.
The key to increasing the growth speed is heat. Heating increases the rate of germination and hence the rate at which the microgreen grows.
One of the best ways to incorporate more heat while growing sunflower microgreens is using a heat mat. Placing your growing tray on the heat mat increases the growing medium’s heat, thereby fastening the rate at which the seedlings germinate and sprout. Additionally, heat mats are not costly and are very durable.
Those who have used heat mats report that the sunflower microgreens not only grow faster but have more flavor and better texture.
What Are the Benefits of Eating Sunflower Microgreens?
Sunflower microgreens are highly nutritious, packed with a wide range of vitamins and minerals like calcium and iron. Because of this, incorporating them into your diet can be highly beneficial.
The following are some of the benefits you get from eating sunflower microgreens:
Reduce Blood Pressure
Sunflower microgreens contain high levels of vitamin C and E, which work well with selenium to expand the arteries, reducing blood pressure and even preventing heart disease.
Promotes A Healthy Pregnancy
These microgreens are rich in nutrients like iron, calcium, and folate, which are important in pregnancy. For example, Folate helps prevent the baby from developing defects like Neural Tube Defects (NTDs).
Boost Fertility
Sunflower microgreens have a high concentration of zinc. Zinc is a highly essential mineral when it comes to sperm development. Therefore, eating sunflower microgreens can improve sperm count.
Improve Immunity
Nutrients found in these microgreens improve the body’s ability to fight microorganisms. It does so by activating each cell in the immune system and ensuring the bacteria in the gut remains healthy.
Help Repair Muscular Tissues
Sunflower microgreens are known to have complete proteins. Complete proteins have all the essential amino acids need by enzymes to the cells to perform crucial functions like tissue repair.
What Pests/Diseases Can Damage Microgreens and How to Stop Them?
Flea Beetles
These are tiny hopping beetles that feed on plant foliage. The most organic way to get rid of flea beetles is by using the Japanese method of soapy water. Simply mix one liter of water with a teaspoon of mile organic dishwashing soap. Spray the soapy water directly on the beetle, and that should kill it.
Aphids
These are sucking insects that come in various colors like red, green, peach, or black. They feed on the underside of the leaves and leave a sticky residue on the foliage that in turn attracts ants. There are various ways to get rid of aphids.
One way is by hand, where you pluck off the heavily infected leaves. Another way is by introducing natural predators like wasps and ladybugs to feed on the aphids. Yet another way would be using mild organic soapy water.
Slugs
Simply, slugs are like snails without the shell. They are usually a problem at night, especially during damp weather. They feed on plant foliage, leaving holes and slime trails. You can get rid of slugs either by a beer trap, where you place a cup or bowl with beer in the soil.
The beer will attract slugs and drown them. Or you could place a jar with cornmeal next to the plants, the scent will attract the slugs, but because they cannot digest it, it will kill them.
Damping-Off
This is a common disease among microgreens, whereby a seedling that appears to be healthy suddenly wilts. It is caused by a fungus that is activated when the soil is too wet or has a high concentration of nitrogen fertilizer. To combat this disease, avoid overwatering or over-fertilizing the seedlings. Also, ensure that there is good air circulation for the seedlings.
Yellow Foliage
This is when the foliage of the seedlings appears to be yellowing. It results from insufficient or lack of light exposure. Therefore, ensure that the seedlings are exposed to enough light and have proper air circulation.
Botrytis
This is a fungus common during cool, wet weather. It causes grey molding on the leaves. The best way to treat this is by first removing the infected seedlings. Then avoid watering at night and placing water on the leaves while doing so.
Root Rot
This occurs when the roots of the seedlings begin to rot. It is caused by various pathogens. First, to deal with root rots, pull out the infected seedlings, and ensure your soil has excellent drainage. Also, practice crop rotation.
Sclerotinia
This white mold is a spiderweb-like fungus that appears to be crawling on the surface of the growing medium. If left unchecked, it could eventually climb onto the seedlings and kill them. The best treatment is to clean equipment thoroughly before use, increase air circulation, and reduce humidity. Also, ensure the seedlings are not overcrowded.
Frequently Asked Questions (FAQs)
Sunflower Microgreens Vs. Sunflower Sprouts (Which is better?)
Sunflower sprouts take a shorter time before harvest and usually do not require a growing medium like soil or wood shavings or light and air. They can be grown hydroponically.
Even so, microgreens have more nutrients than sprouts. At the end of the day, what matters is your aim of growing them. If you are looking for nutritional benefits, then sunflower microgreens are the way to go. But if you are impatient, then sunflower sprouts are your best choice.
How much light do sunflower microgreens need?
At the initial stage of sprouting, sunflower microgreens do not need any light. After the blackout period, however, they require between 12-18 hours of light. It could be direct sunlight or under a growing light.
What temperature do sunflower microgreens need?
Sunflower microgreens are known to love the heat. They are reported to grow faster at a higher temperature. It has been reported that they grow successfully between temperatures of about 68-77 degrees Fahrenheit.
How long do Sunflower Microgreens take to grow?
Growing Sunflower Microgreens could take about 2 weeks before you can harvest. That is, about 2-4 days to germinate and about 8-14 days to grow to the point suitable for harvest.
Do sunflower Microgreens regrow after harvest?
Unfortunately, no. But the good thing is replanting them is easy. Just remove the old roots and scatter freshly germinated seeds.
How should you harvest Sunflower Microgreens?
The best way to harvest sunflower microgreens is by using a sharp pair of scissors. Cut the stem at the base just above the soil/growing medium.
How should you store Sunflower Microgreens?
Refrigeration is the best way to store these microgreens. However, if you are going to refrigerate, avoid washing them. Simply put them in an air-tight zip lock bag and store them.
Why are my Sunflower Microgreens falling over?
Sunflower microgreens tend to fall over when growing under poor conditions. Such conditions could include:
- Insufficient or intense lighting
- Poor ventilation
- Over or under watering
- Overcrowding of seedlings or a few seedlings in the growing container
- Diseases and pest infestation
Therefore, ensure that the seedlings and soil are moist enough and not wet. Avoid spraying water from the top; instead, do so from below. Ensure there are proper air circulation and sufficient light. In case some of the seedlings are infected or infested, remove them and treat the rest.
Sunflower Microgreen flavor + How to use them?
Sunflower Microgreens have the nutty flavor of sunflower seeds and a crunchy texture. They are great in salads, sandwiches, soups, wraps, pasta; the list of recipes is endless!
How do you prevent damping off?
Damping-off, that is, the wilting of seedlings, can be prevented by avoiding overwatering and ensuring good air circulation. Air movement is important because it prevents the growth of molds, and overall, the plant grows stronger.
Recap
Sunflower Microgreens are a wonderfully healthy addition to your salads, soups, sandwiches, even pizza! Aside from their delicious nutty flavor and wonderful crunchy texture, they are also highly packed with nutrients like minerals and a wide range of vitamins. Compared to their larger counterparts, they seem to carry a higher concentration of nutrients.
But the best part about these microgreens is that they can be grown easily in the comfort of your home, at a very affordable cost. Sunflower microgreens can be grown not just in soil but other mediums like growing paper or grow mat. So, you don’t have to worry about the dirt and mess.
Another great thing about sunflower seeds is they grow fast, especially with a slight boost of heat. In less than two weeks, you get to enjoy the fantastic taste and health benefits that come with sunflower microgreens, and the list of benefits is endless.
However, like other plants and seedlings, sunflower microgreens are prone to certain diseases like damp off and pests like aphids. However, the good news is that these diseases are treatable, and the pest infestation can be controlled.
So, if you are looking for highly nutritious greens to spice up your meal, Sunflower Microgreens are the smart choice. The list of recipes that you can use these microgreens in is endless, so grow yours today!
Sources
- https://grocycle.com/grow-sunflower-microgreens/
- https://www.healthline.com/nutrition/microgreens
- https://gardentherapy.ca/sunflower-microgreens/
- https://www.epicgardening.com/sunflower-microgreens/
- https://seedmart.com.au/blogs/vegan/how-to-grow-sunflower-microgreens
- https://gilesprout.com/sprouting-instructions/instructions/sunflower-microgreens/
- https://www.italiansprout.com/en/blogs/mangiare-sano/periodo-blackout-microgreens-perche-importante
- https://www.biocompositesgroup.com/grow-mat.html
- https://savvygardening.com/how_to_grow_broccoli_sprouts/
- https://www.youtube.com/watch?v=9mMkPlcE1I0&ab_channel=OnTheGrow
- https://backtonaturalfarm.com/index.php/2018/11/19/sunflower-microgreens-nutrition-and-health-benefits/
- https://www.burpee.com/gardenadvicecenter/encyclopedia/vegetables/learn-about-microgreens/encyclopedia__microgreens-article.html
- https://www.almanac.com/growing-sprouts-vs-microgreens#
- https://donnygreens.com/blogs/microgreens-business/how-to-grow-sunflower-microgreens-full-walkthrough#:~:text=Nevertheless%2C%20I’ve%20had%20no,and%20a%20high%20germination%20rate
- https://www.greensguru.com/how-i-grow-sunflower-microgreens-soil-free-and-win-all-the-time/
- https://www.pinterest.com.au/themightymicrogreen/mighty-sunflower-microgreen-recipes/
")
")
