
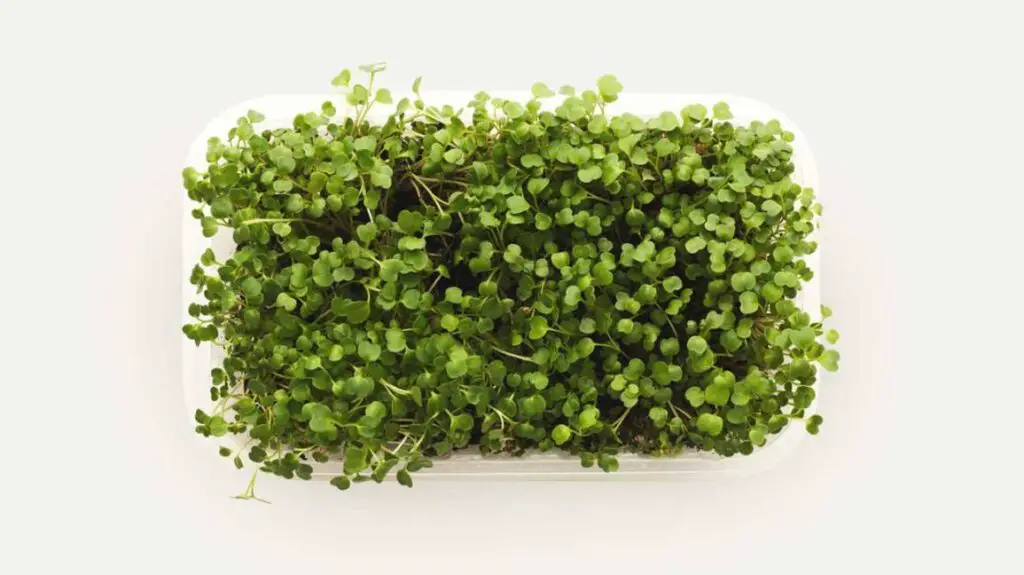
Microgreens – exactly as their name suggest, small and immature version of the plants. They should be around 3 – 7 inches tall, and some are naturally shorter, like mint and oregano, or taller like sunflower and dill.
Dill is a powerful herb full of health benefits and has been used for its nutritious values for a long time. It is long, a bit like grass, but is aromatic with a mild citrusy flavour with a spice hint. It is popular to use in seafood dishes and soups, as well as salads.
Microgreen dill has contained more nutrients than its normal size version, so it is no surprise that it’s popular. Growing your own crop means you can have it all year round available at your reach. Many have been growing it for personal use, and some have been more enterprising and grow it as a source of income.
Once you know the process of how to grow your own, you will never look back. This article will look at different mediums you can use, the benefits of dill, and what you need to successfully grow your own microgreen.
Equipment Needed to Grow Dill Microgreens
You don’t need anything fancy to start your dill microgreen venture. You don’t even need a big garden.
Here are some of the things to consider buying:
- A Grow Tray – you can buy this from garden centers or even use old food or take-out containers. Just make sure to clean it well before use. The size is up to you; it depends on how ambitious you want to start.
- Good source of water – it’s good to keep an eye on how well it is watered, but you want something that can distribute the water gently. Many opt for small water can.
- A circulating fan – is important to keep the tray well aerated to prevent any mold or diseases from occurring. We’ll discuss this in more detail below.
- Soil (potting soil) – this one is your choice; you can use ordinary soil from your garden or buy some special with added nutrients. But you can choose another medium if you wish.
- Wood shaving – you can choose this as an alternative to soil, which will be discussed more in the article.
- Growing Paper – another alternative from the soil, which will be discussed more in the article.
- Grow Light or natural light – Dill needs a lot of light to germinate, so if you have a windowsill that gets a lot of sun and light, then perfect! But if you’re not as lucky, then a grow light is a good option.
- Microgreen Seeds
- Plant markers – useful if you are growing more than one type of crop
- Warming Mat (Optional) or Heating Pad (Optional)
How to Grow Dill Microgreens in Soil?
Step 1 – Prepare Your Pot or Tray
It is good to choose a tray without any drainage holes; you can easily find them online or at your local garden store. You can choose the size you want to start with, so there isn’t one rule on this option.
Alternatively, you can use other types like plant pots, empty containers for food, or take-out – make sure that it is sparkling clean before use.
Step 2 – Soil
It is good to choose a potting soil that’s organic but sterile. Once you have your soil, you can fill up your tray or container with some potting soil, preferably one inch from the rim of the tray, even out the surface of the soil.
Step 3 – Add the Seeds
Once you have prepared the soil in the tray, you spread the seeds evenly across the tray. It doesn’t have to be a perfect line, so you can be as generous as you want.
After you have finished spreading the seeds across the tray, you can add a dusting of potting soil over the seeds. You can now water the tray, ideally with a sprinkler can, for gentle and even coverage. It should also prevent you from overwatering the batch.
Step 4 – Keeping an Eye
There’s no need to cover the seeds because dill needs a lot of light to germinate and grow well. Therefore, it is best to place them by a windowsill or use a grow light.
You can keep the soil watered throughout the growing process, but again use a sprinkler can so you can spread the water gently and evenly. You can even use a misting spray to control better how much you are watering your seeds.
It’s so easy to overwater the soil, so only a small amount of water will suffice. You can check the soil to see if it is drying.
Step 5 – Harvesting
Once you see the first leaves appearing, then you are ready to harvest your greens.
You can cut the across the stem of the plant, just above the soil. It’s effortless!
Once you’ve finished harvesting, you can use it straight away on your dish or store it away in a sealed bag or container (preferably glass).
You can expect this to start happening up to 14 days of planting.
How to Grow Dill Microgreens with A Grow Mat?
A growing mat can be a convenient way of growing your dill microgreens, especially if you want to take care of it indoors and don’t want the soil’s mess. The perfect location will be a windowsill that gets ample light during the day.
Step 1 – Prepare Your Tray
It is important to clean your tray first before placing it on your mat; ideally, give a good wash before use. Again, the type of tray you choose is totally up to you.
Once you are sure that it is clean, you can then begin to cut the mat to fit the tray you have chosen to use.
Step 2 – Saturate the Mat
Once you have cut and placed the mat into the tray, you can pour water into it until it’s floating in half an inch of water.
Let the mat sit in the water for a long period of time, preferably overnight.
Once you have let the mat sit in the water for long enough, pour out any excess water. The mat at this point should be moist but not floating in the water still.
Step 3 – Planting Your Seeds
Spread the seeds evenly over your moistened mat, again. Don’t worry about being perfect because the important thing is the mat is well covered.
Like with the soil, there’s no need to cover the crop because dill needs a lot of light to grow well. A bright spot will help it to grow.
It’s always good to label your plant – if you are growing more than one. It’s always good to note the date you planted it to give a good idea of when it will harvest and when it might need more water.
Step 4- Light Misting
The seeds will not need any moisture until day two and four after planting. Dill doesn’t need a lot of water, so a misting spray is better for gently tapping up moisture.
Aside from the seeds’ misting, you won’t really need to water them until day seven properly. You must water the mat gently, ideally around the mat’s edge, and tilt the tray to spread.
Step 5- Keeping an Eye
A good circulation of air can help the mat stay in good condition, which will prevent mold from growing from the seeds. You can move the tray to a breezy area, placing it by an open window, or you can use a fan – just mindful of the mat going dry.
It is best to move the tray to an area that gets ample light, or you can use grow lights.
Take care that your seedling doesn’t dry out. Just make sure you water the edges gently and tilt the tray around to spread.
Step 6 – Harvest
Dill microgreens are ready to harvest once it is around 1 to 2 inches tall, usually around 14 days of growing.
This is the best point for flavor when baby leaves have grown.
You can harvest the dill in two ways:
- You can cut with scissors, just above the mat.
- Alternatively, you can pull them gently from the mat.
How to Grow Dill Microgreens in Wood Shavings?
An alternative option from growing mats and soil is wood shavings. It might be a bit messier, but it’s ideal if you want a sustainable method that’s compostable. The shaving cannot be reused, like soil.
You can buy fine-sized wood shaving from the feed store used as bedding or buy shaving specific for microgreens.
Step 1 – Prepare Your Pot or Tray
Find a tray without any drainage holes. Alternatively, you can use other types like plant pots, empty containers for food, or take-out – make sure that it is sparkling clean before use and cover the holes.
Step 2 – Fill Up with Shavings
The next thing to do is fill up your tray or container with some wood shavings, same as the soil around one inch from the rim of the tray. Even out the surface of the soil.
Step 3 – Add the Seeds
Once you have prepared the shavings in the tray, you spread the seeds evenly across the tray. Again, It doesn’t have to be perfect coverage, so you can be as generous as you want.
You can now water the tray, ideally with a sprinkler can, so you can achieve a gentle coverage, which will prevent you from overwatering.
Step 4 – Keeping an Eye
Like the soil process, dill does not need to be covered. Your dill seeds need a lot of light to grow well, therefore, it is best to place them by a windowsill, or you can use a grow light.
You can keep it watered throughout the growing process by using a sprinkler can to spread the water gently and evenly. You can even use a misting spray to help you monitor how much you are watering your seeds.
It’s so easy to overwater the tray, so it is best to keep an eye on how much water you are using.
Step 5 – Harvesting
As soon as you spot the first leaves appearing, then it’s ready to harvest your greens.
You can expect this to start happening up to 14 days of planting.
Again, a similar method just cut across the stems of the plant just above the wood shavings.
How to Grow Dill Microgreens on Growing Paper?
Growing paper, or even paper towels and filter papers, are great mediums for growing microgreens. Again, it is a clean way to tend to your crop, and it is free of pathogens, and the moisture is easier to control.
Step 1 – Prepare Your Paper
You can purchase special paper to use for growing microgreens or sprouts, and they are available online. Some use a simple paper towel or filter paper. It is totally up to you.
Once you have chosen your paper, shape it to fit the tray of your choice.
Step 2 – Tray Prep
Once the paper is in the right shape, put it in the tray by placing it into the bottom of the tray.
Step 3 – Water the Paper
Next, you need to soak the paper in water for a couple of hours.
Once that’s done, you will need to carefully drain away any excess water left in the tray.
Step 4 – Seeds
Now, it’s time to place your seeds across the paper. There’s no need to cover the tray because your dill seeds will need as much light as possible.
Step 5 – Keeping an Eye on Your Seeds
It’s easy to maintain the moisture level with the paper. You can check how dry it is and add water gently as needed.
Dill needs a lot of light to grow well, so it is best to place your tray on a windowsill or use a grow light as an alternative.
Step 6 – Harvesting
Dill can take up to 14 days for the first baby leaves to grow, and as soon as it does, it is ready for you to harvest.
You can cut them from the paper to harvest when ready or pull them gently from the paper.
How Can You Speed Up Growth?
Maybe you want to make the growth period faster. If so, then you should think about raising the temperature of the soil. You can use heat mats under the tray. The mats are waterproof and usually used for seed starting but are also perfect for microgreens.
These heat mats will help raise the soil’s temperature about 10˚ over the room temperature, which will cultivate an environment perfect for fast germination.
Related Articles:
- How To Grow Basil Hydroponically
- How To Grow Fenugreek Hydroponically
- How To Grow Broccoli Hydroponically
What Are the Benefits of Eating Dill Microgreens?
Dill is a healthy and powerful herb that contains monoterpenes, such as limonene, carvone, and anethofuran. It is also full of wonderful minerals and vitamins, like A and C and iron, manganese, and folate.
Keep Your Bones Healthy
Dill has a good amount of calcium that can contribute to the calcium levels of the body, which can help protect your body from bone loss or reduction in density. Issues with bone density loss, such as osteoporosis, is experienced by many, and so consumption of dill can help in small ways, prevent or repair damages to your bones.
Manage Issues with Diabetes
Dill has been linked to diabetes, especially managing the levels of insulin in the body. Studies are limited, but there’s been some indication that it may reduce the fluctuation in serum lipids and insulin levels.
Increased Immunity
Dill is thought to have antimicrobial benefits and adding it to your diet; could be helping your body reduce microbial infections.
Relieves Pain from Arthritis
It’s believed that dill is beneficial for anti-inflammatory issues. It can help lessens inflammation and other pain issues, like gout and arthritis.
Helps Issues with Respiratory Disorders
The monoterpenes and flavonoids found in dill are often used in essentials oils to treat antihistaminic and ant-congestive issues. It’s believed that these components of dill can help clear any problems due to coughs, allergies, or histamines.
What Pests/Diseases Can Damage Microgreens and How to Stop Them?
There are some things you need to look out for to keep your microgreens healthy:
Botrytis
A type of fungus causes a grey mould on leaves, which occurs in cold and wet conditions.
If you spot this mould on your greens, it would be advisable to take off affected parts. Try to avoid watering the greens at night and try to water on the side of the medium instead of being directly on the plant. Good circulation of air can also help stop the fungi from growing.
Damping Off
It is a common problem for seeds starting. It will grow out looking healthy, but it will then begin to wilt and die. It’s caused by a fungus that thrives in moisture and means that the soil is too wet or too many nitrogen fertilizers.
It’s recommended to keep the medium and seeds moist but not wet, which can cause overwatering. Make sure that there’s enough air circulation. If you are using fertilizers, then try to small amounts.
Root Rot
Various pathogens can cause root rot on seedlings.
If you notice root rot, pull out the infected plant, and ensure that the soil has good drainage.
Sclerotinia
Sclerotinia is also called white mould, a spiderweb-like fungus that grows on the surface of your medium, which has the ability to climb onto the plants and infect them, causing them to die.
It’s advisable to decrease the amount of humidity around the plant and create good air circulation. Avoid overcrowding when spreading the seeds.
Yellow Foliage
The reason this issue occurs is that the greens are not getting enough sunlight. It may also be that there’s an issue with overcrowding and not enough nutrients available.
If you notice this happening, you should move the tray to a different location to get enough light and air. It might also be good to add a small amount of light fertilizer to give it more nutrients.
You should also always be mindful of pests:
Aphids
These can be found underneath the leaves and spread disease. They are green, black, peach, or red coloured. They leave residues on the plant that attract ants.
You can try to attract natural predators like beetles and wasps, which feed on aphids. Or you can try washing them with insecticidal soap or strong spray.
Deer
If your plants are outside, then there is a threat that deers could eat them. You can try and find some deer repellents or build a barrier for your plants.
Flea Beetles
These feed on the foliage. You can try to rotate the crops with other plants or use a floating row to cover and prevent damage.
Rabbits
Rabbits can chew up and eat plants but not to the same degree as deer.
You can prevent rabbits by using repellents.
Slugs
Slugs can eat large holes into the foliage of the plants. They leave trails and usually eat at night. They often appear during wet weather conditions.
You can pick them off at night or attract them to traps like beer or cornmeal. When making the beer traps, make holes in the ground, put a cup or bowl in the hole, and choose something deep so they can’t get out. Fill it with ¾ of beer and leave it during the night. In the morning, you will find the slugs drowned from the beer.
The cornmeal trap requires two tablespoons of cornmeal in a container and place it close to the plants. They are attracted to the cornmeal’s smell but are incapable of digesting it and will kill them.
FAQ
Dill Microgreens Vs. Dill Sprouts (Which Is Better?)
Microgreens have a huge nutritional value and are said to contain around 40 times more than the plants’ mature versions. On the other hand, sprouts are also nutritious, but those nutrients are stored up from the seed and aren’t really given enough type to develop, unlike the microgreen version.
How Much Light Do Dill Microgreens Need?
The dill seeds’ germination requires light, a lot of it, so it is vital not to cover it once you have put the seeds on your chosen medium. Natural light is fine and well, but if you have it somewhere with direct sunlight exposure, you may need to monitor the soil’s moisture more often.
What Temperature Do Dill Microgreens Need?
It’s ideal to have a temperature of around 18 to 22˚c. Like we discussed before, if you raise the temperature, then it will boost germination. If you lower the temperature, it can freeze the growth.
How Long Do Dill Microgreens Take to Grow?
Dill microgreens can take around 14 days for the first leaves to appear. The germination process of the seed will be about 2 – 3 days.
Do Dill Microgreens Regrow After Harvest?
If the first crop of microgreens is removed with scissors instead of pulling from the root, you attempt to regrow the greens. It just means tending to the plant as you have before the first harvest. You don’t need to remove the seeds. The shoots and roots are enough to help it grow.
How Should You Harvest Dill Microgreens?
You can harvest your microgreens by cutting across the plant just above the soil. Now, if you want to regrow your microgreens, then cut just a little bit higher from the soil to leave room for the stem to grow.
How Should You Store Dill Microgreens?
Once you have harvested your microgreens, you can store your crop into a plastic bag or a sealable contained – glass, preferably. Make sure to store it in the fridge once you’ve packaged it up.
Shelf life is around 5 – 10 days.
Why Are My Microgreens Falling Over?
If you find that your microgreen is falling over, then it could mean that it lacks water.
Ensure that the medium you are using is wet but not soggy because it can cause mold to grow.
Dill Microgreen Flavor + How to Use Them?
Dill can remind you of long grass, but it will add a touch of spice to your dish.
It is prevalent in seafood dishes and soup recipes. It is also perfect as a garnish to finish for your meals.
How Do You Prevent Damping Off/Why Is Air Movement Important?
Maintaining good air circulation is important in keeping pests, diseases, and mold at bay, like damping off.
Damping-off is when the leaves become noticeably shriveled and darkened.
Besides air circulation, you can also keep an eye on the temperature kept at the optimum level, and a good light source can help your plant grew fast and resistant to diseases.
Recap
Hopefully, this article has now convinced you to start growing dill microgreens. Dill has so many health benefits that it makes sense to start growing it and adding it to your daily diet.
It is a perfect herb to use for seafood dishes and soup recipes, so it’s convenient to have in your kitchen. Now, what’s even better is you can make your own crop of dill microgreens.
There are various mediums to choose from if you want to try something different from the soil, like grow paper and wood shavings. The instructions above illustrate how simple it is to grow microgreens.
Of course, you must be wary of issues that could arise when growing your microgreens, like pests and diseases, so we’ve covered the main culprits to look out for when you start.
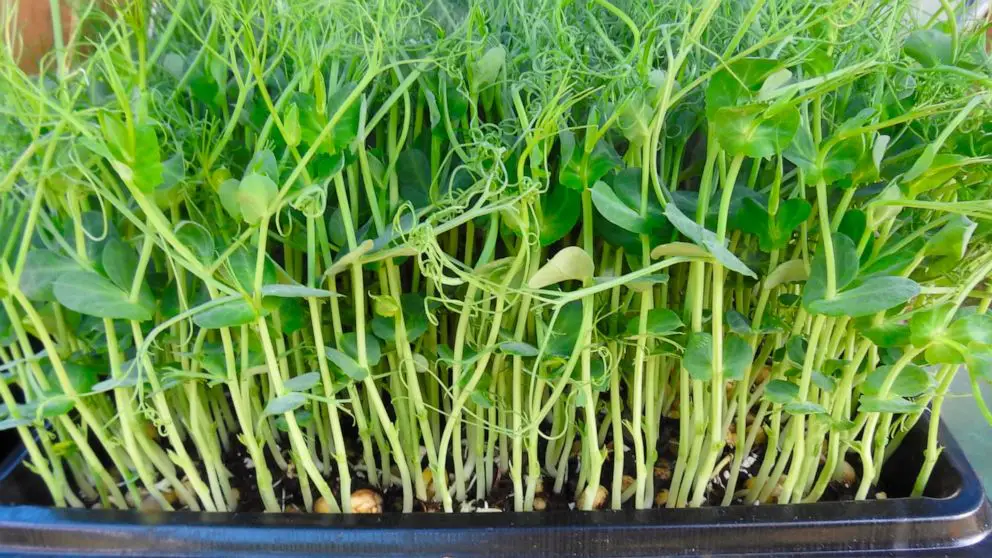
Once you start with dill microgreen, you can easily attempt to grown other types, too, like pea shoots, broccoli, or kale.
Sources
- https://sproutpeople.org/growing-dill-micro-greens/#:~:text=Growing%20Instructions&text=Plant%201-2%20teaspoons%20of,Light%20helps%20Dill%20Germinate!
- https://morningchores.com/microgreens/
- https://savvygardening.com/how_to_grow_broccoli_sprouts/
- https://www.mother.life/en/discover/microgreens/dill
- https://www.johnnyseeds.com/slow-growing-microgreens/dill-microgreen-seed-920M.html?cgid=slow-growing-microgreens
- https://practicalgrowing.com/microgreens/regrow-after-cutting/#:~:text=Ideally,%20you%20should%20water%20microgreens,ones%20you’ve%20just%20eaten.
- https://www.organicfacts.net/health-benefits/seed-and-nut/dill.html
- https://salisburygreenhouse.com/microgreens-vs-sprouts/
")
")
